

Yes! Same rules apply – they have to be SOFT & FUN. In terms of fabrics, choose a warm, soft fleece or a breathable stretchy cotton. Print choices are endless, but make sure they are Sassy! I’ve seen some neat hats that were plain colors but had a sequined applique embellishment.
Seams-Out Sassy Cap Pattern
This pattern was created by Katrina Woolley specifically for Sassy Caps! Katrina didn’t like how most of the patterns either require doubling the material (which, in fleece, is super heavy & hot) or had seams on the inside that could irritate the skin. So she created this awesome hat that has all but 2 of the seams on the outside! These have quickly become favorites to our Sassy Cap recipients, and are quick & easy, so give them a try!
Here are the directions (with pictures). *Note – this was done with a plain, light gray fleece to make the pictures easier to understand. It was also a special request from its intended recipient. Don’t worry – we put a cute heart pin on it to Sassify it!
Cutting your pieces:
- Click here to download & print the Seams-Out Sassy Cap Pattern on cardstock. Cut out the 3 pattern pieces: A, B & C
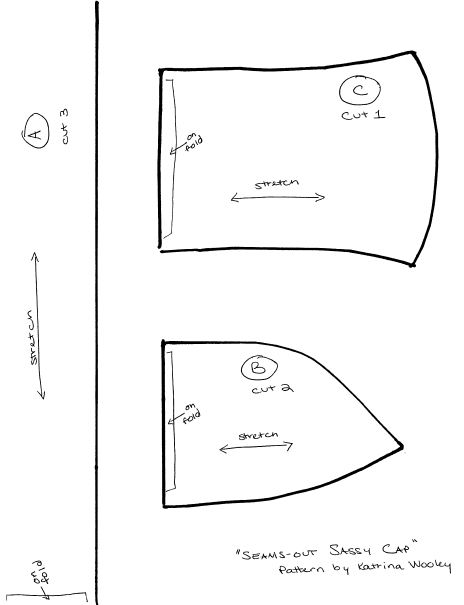
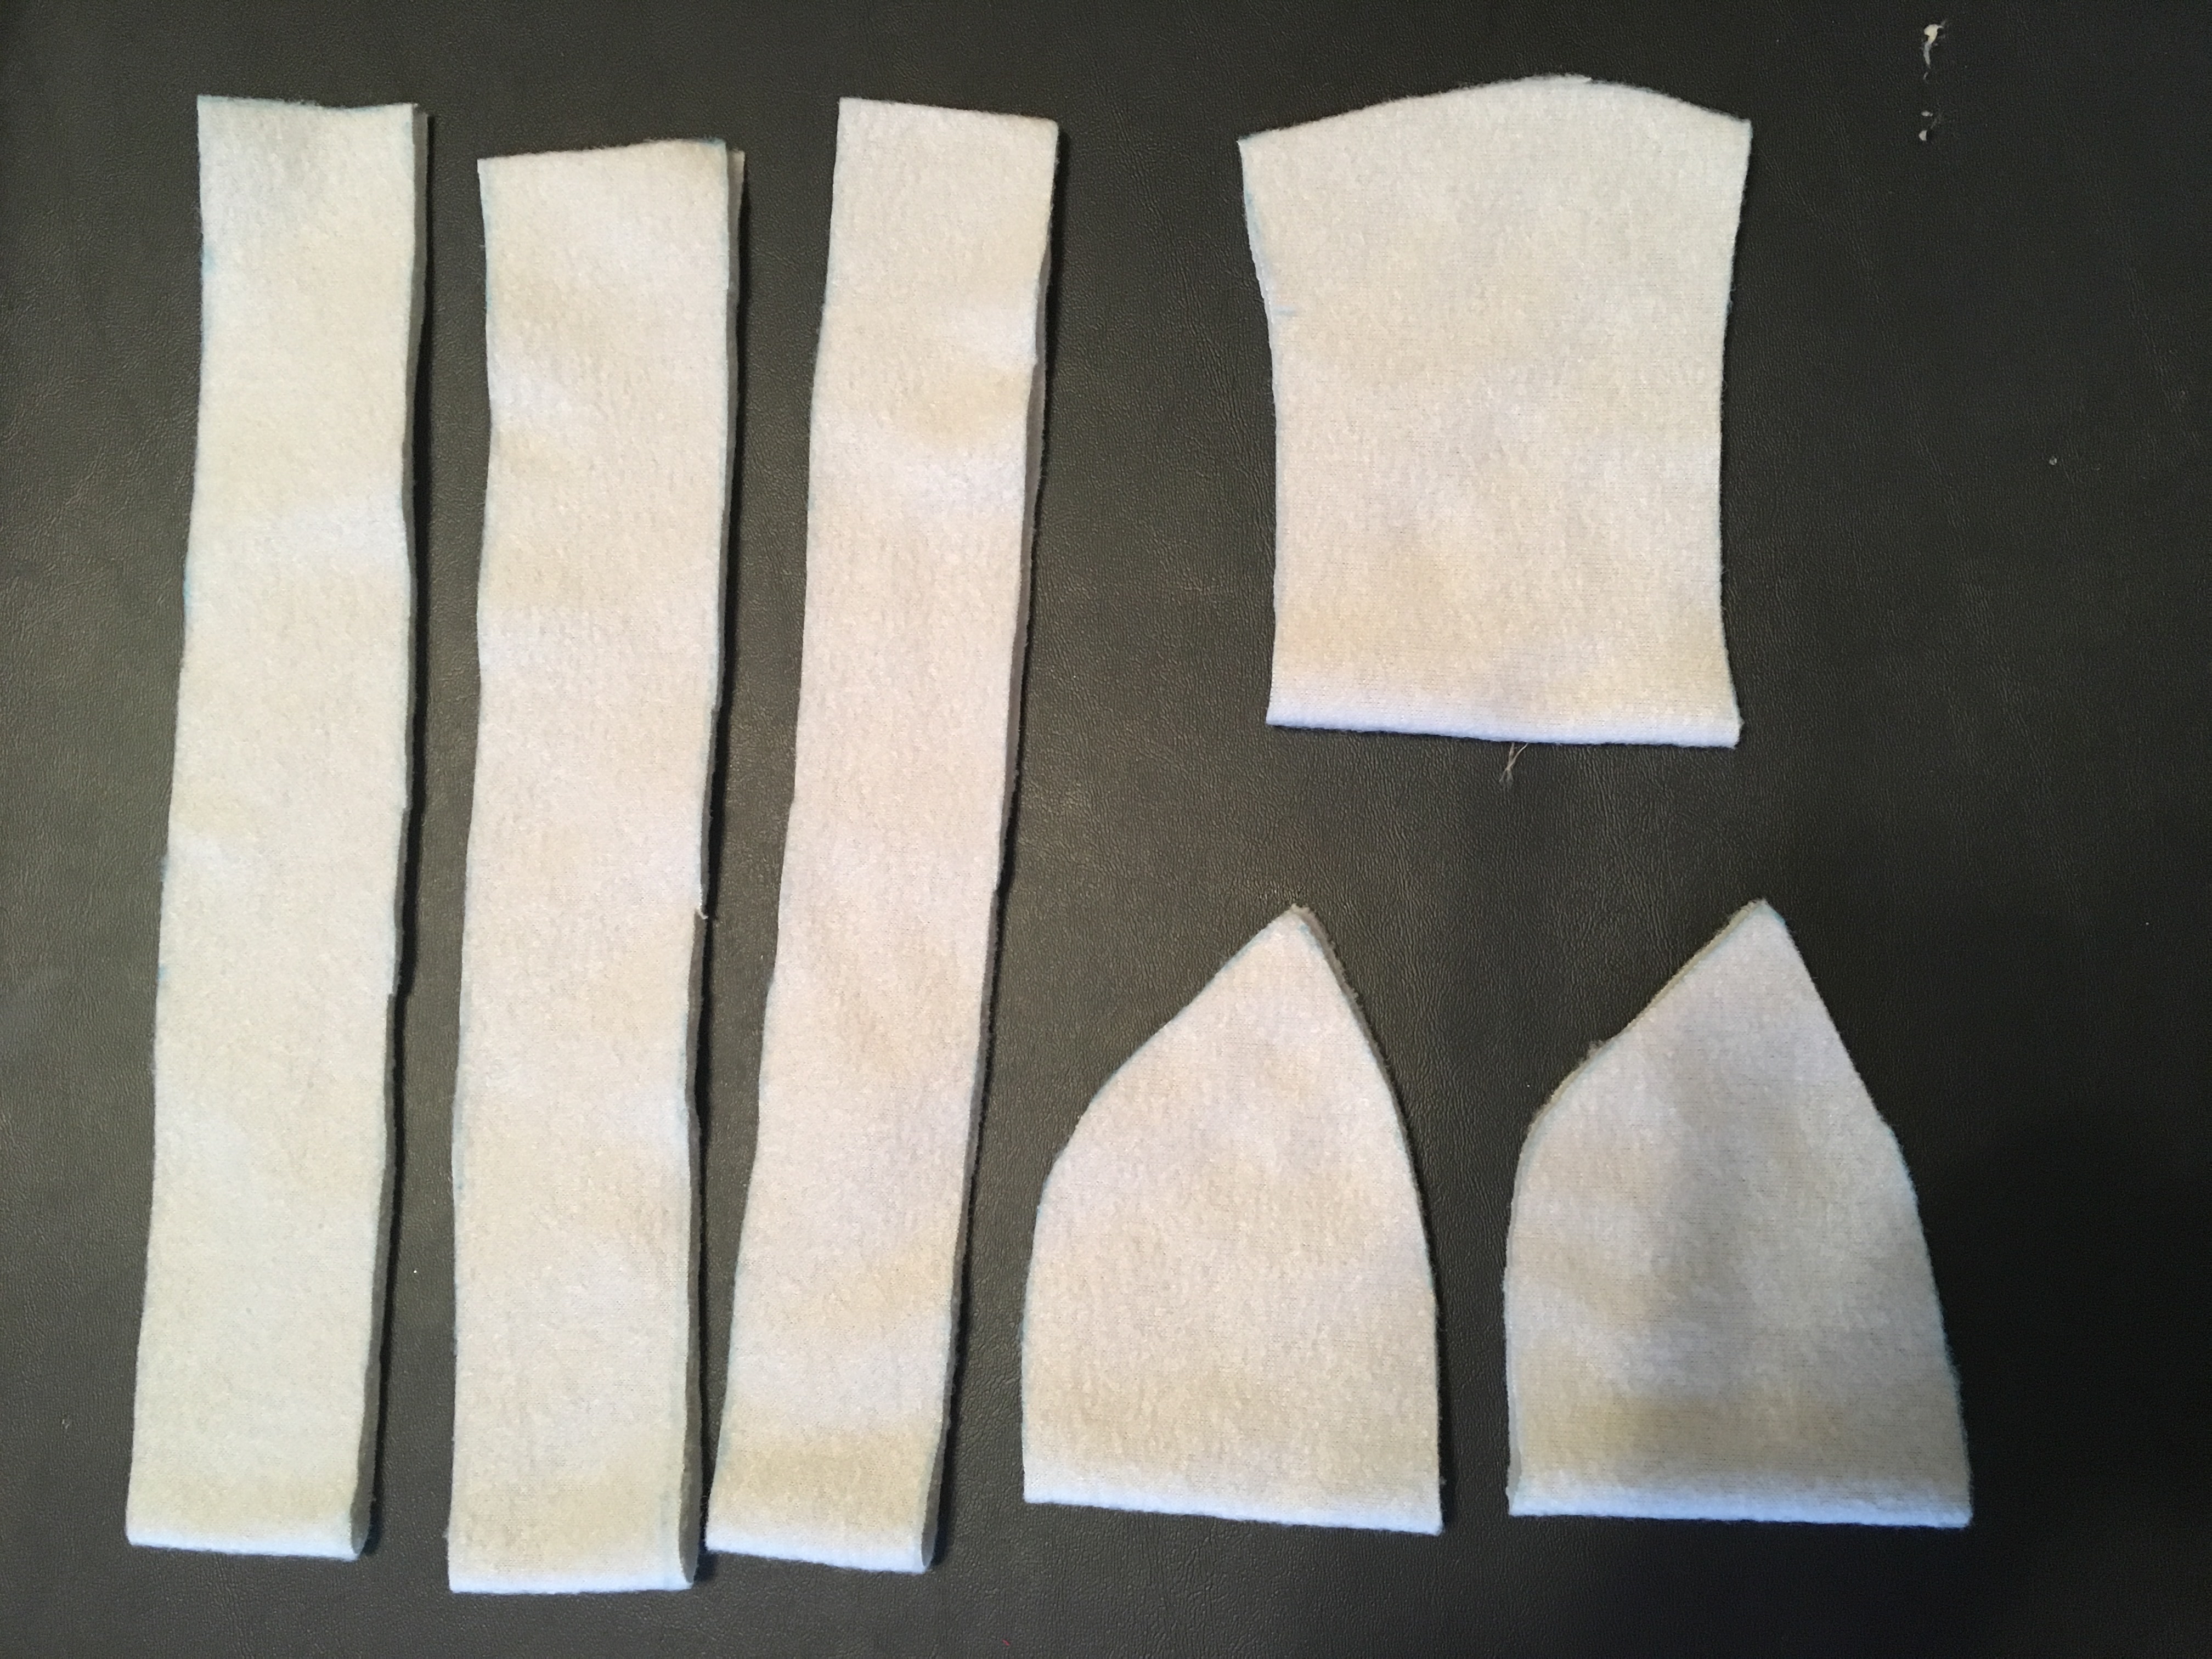
- Find the stretch of the fleece. Place pattern pieces on the fold, matching the stretch direction. Using a marking pen that washes out, trace & cut 3 of piece A, 2 of piece B, and 1 of piece C. It’s important to use a washable pen because, with the raw edges exposed in this hat, you don’t want people to see your marks.

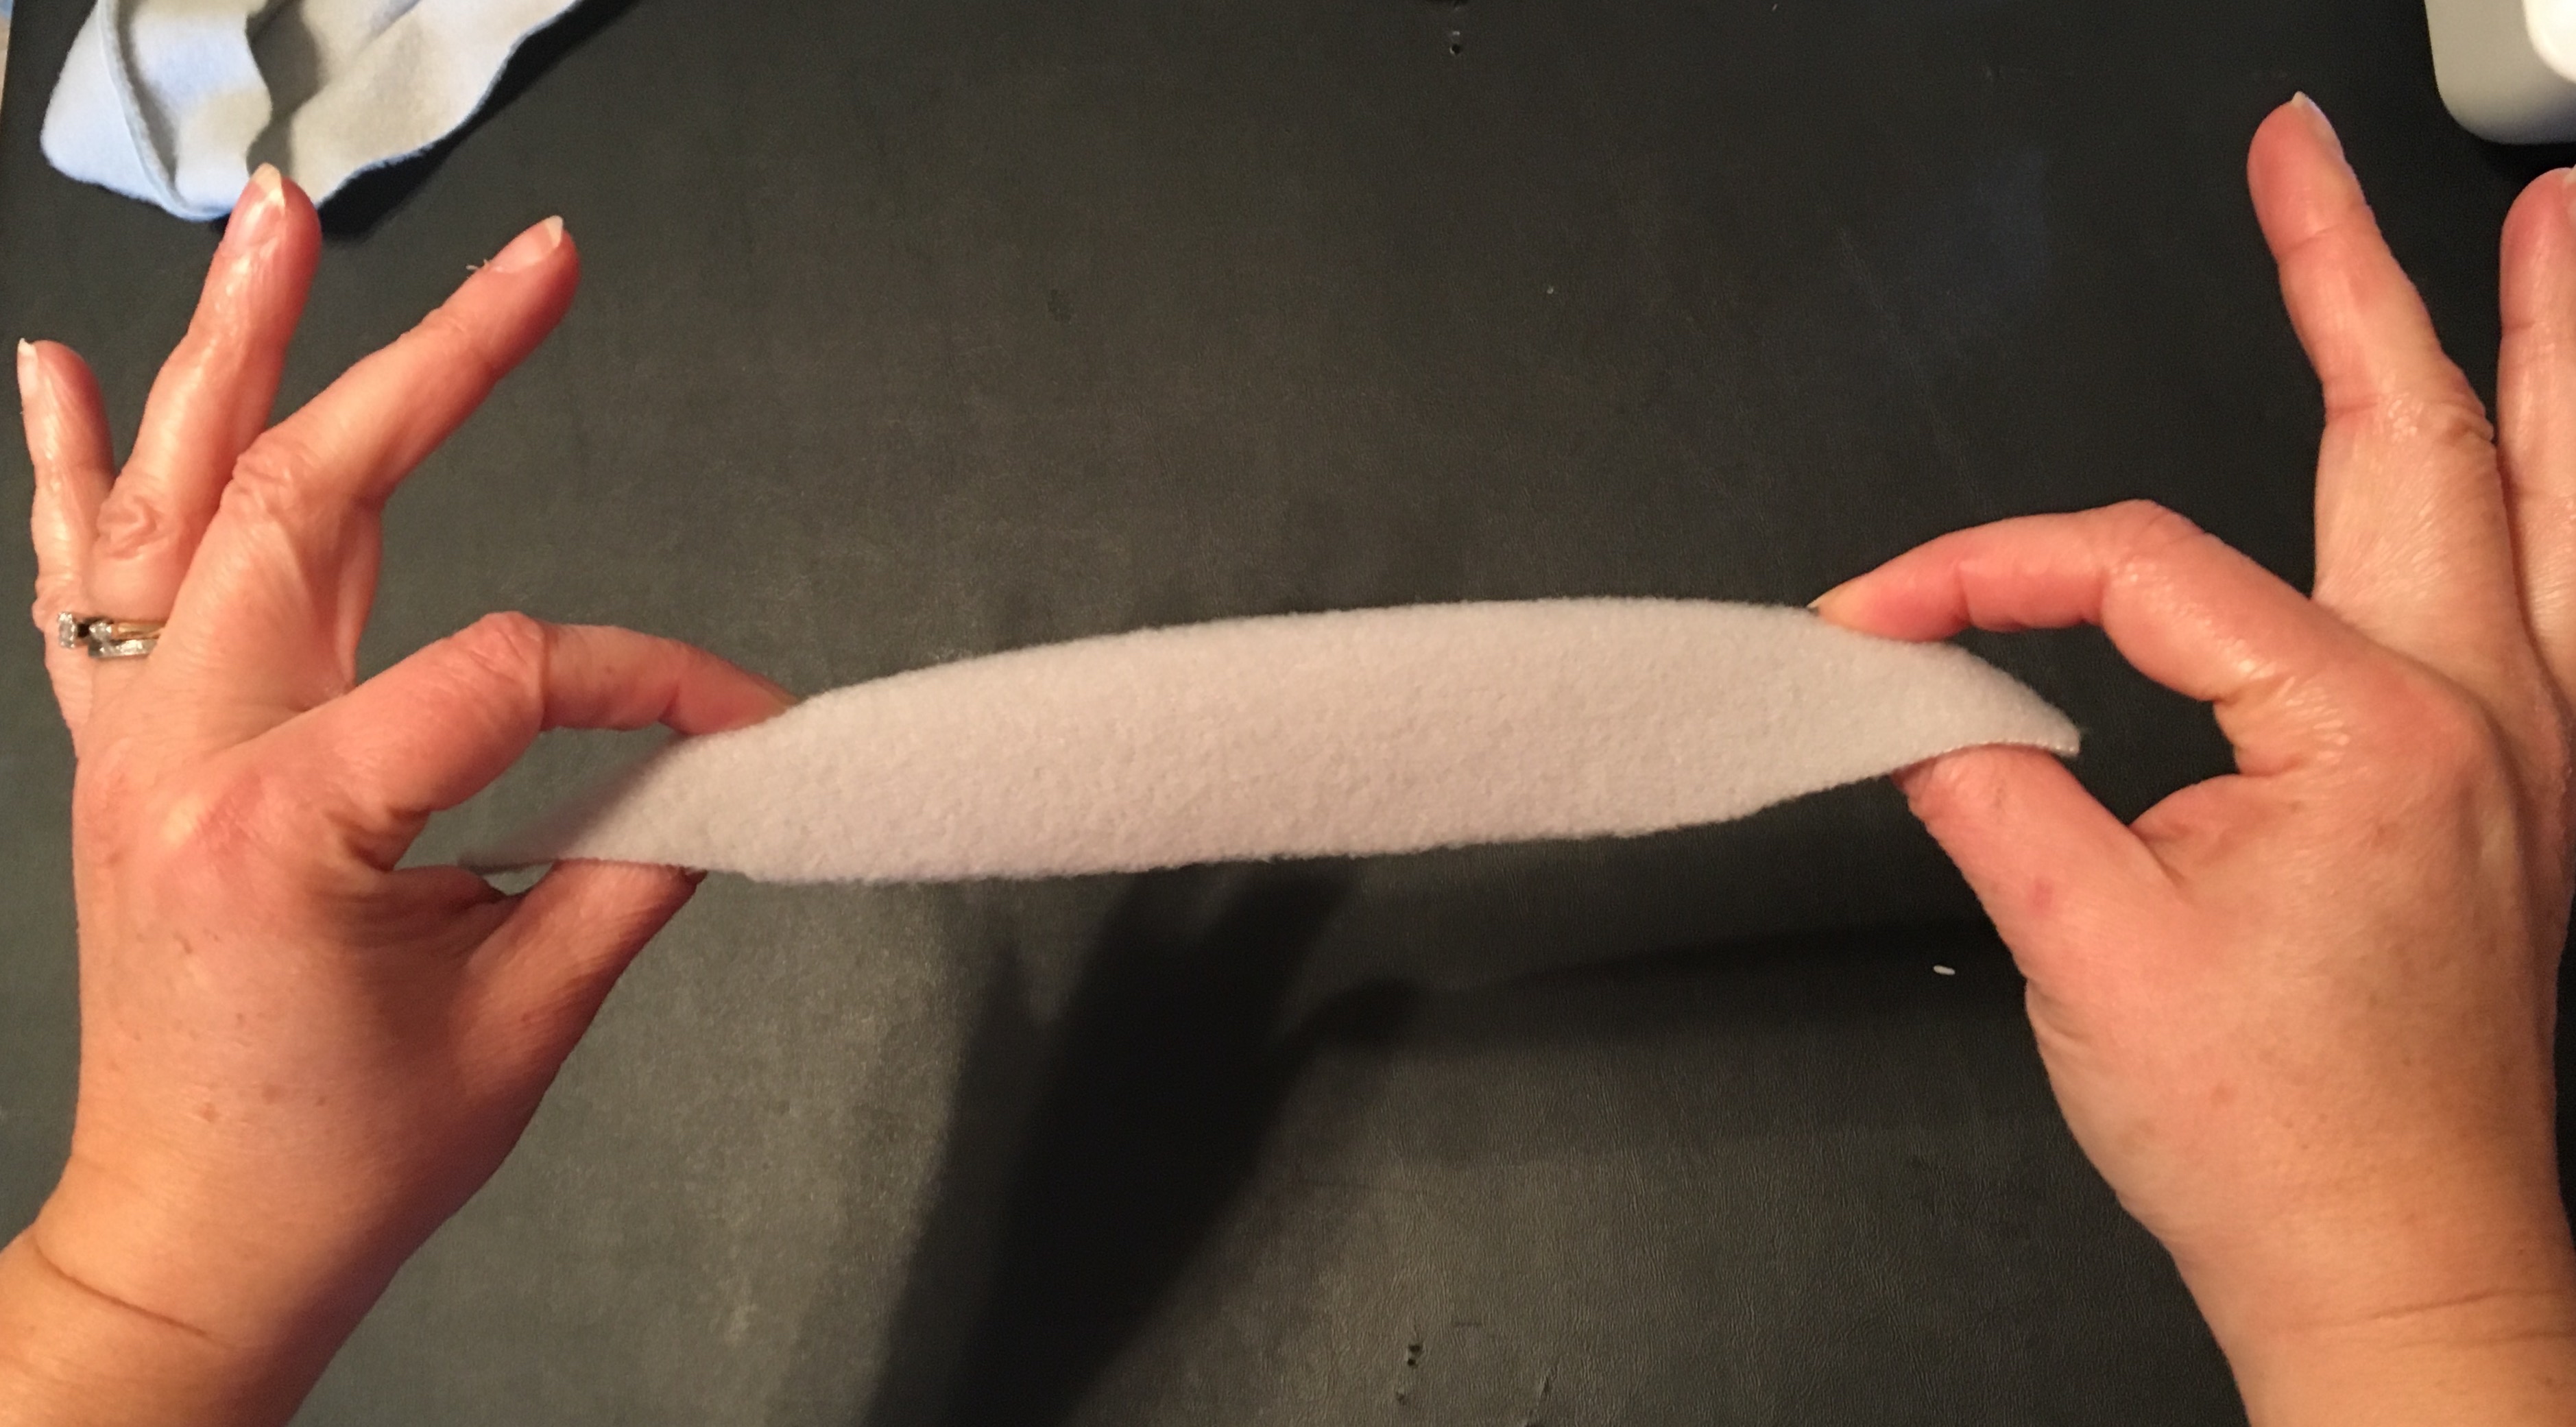
- Make sure all pieces roll the same direction when stretched to find the “right side” of the fleece. When pulled, sides will automatically roll toward the wrong side.
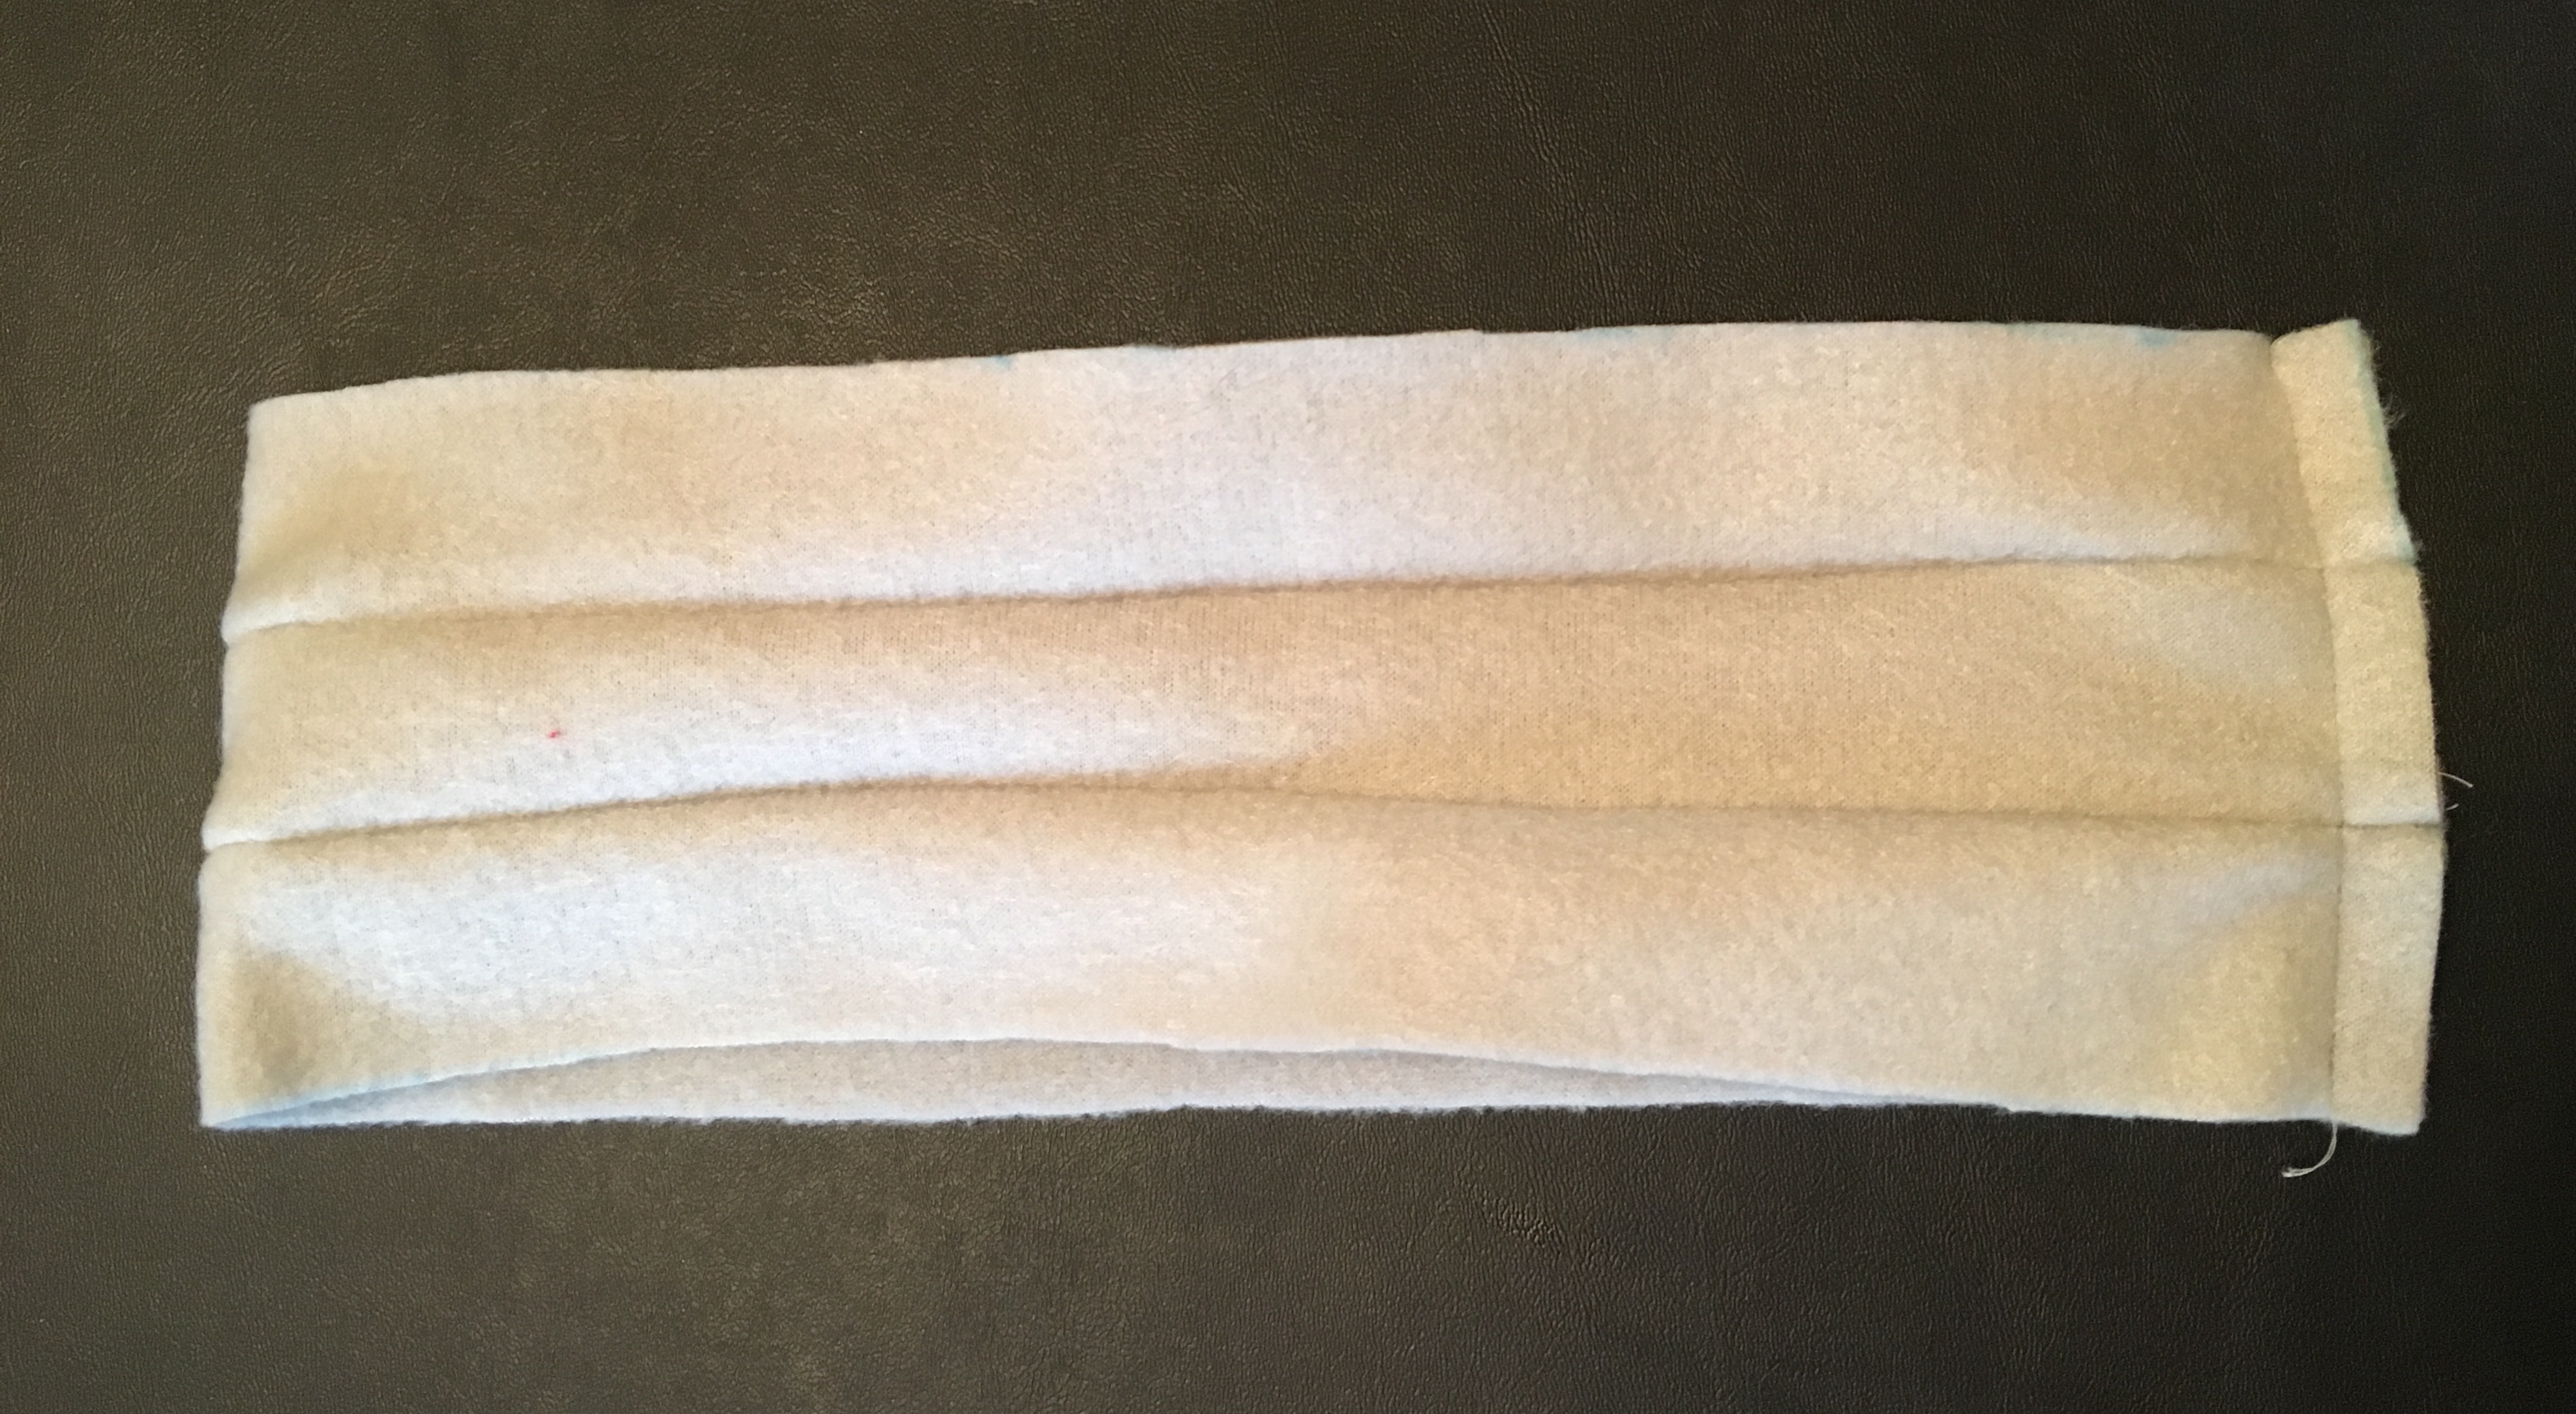
Making the Band:
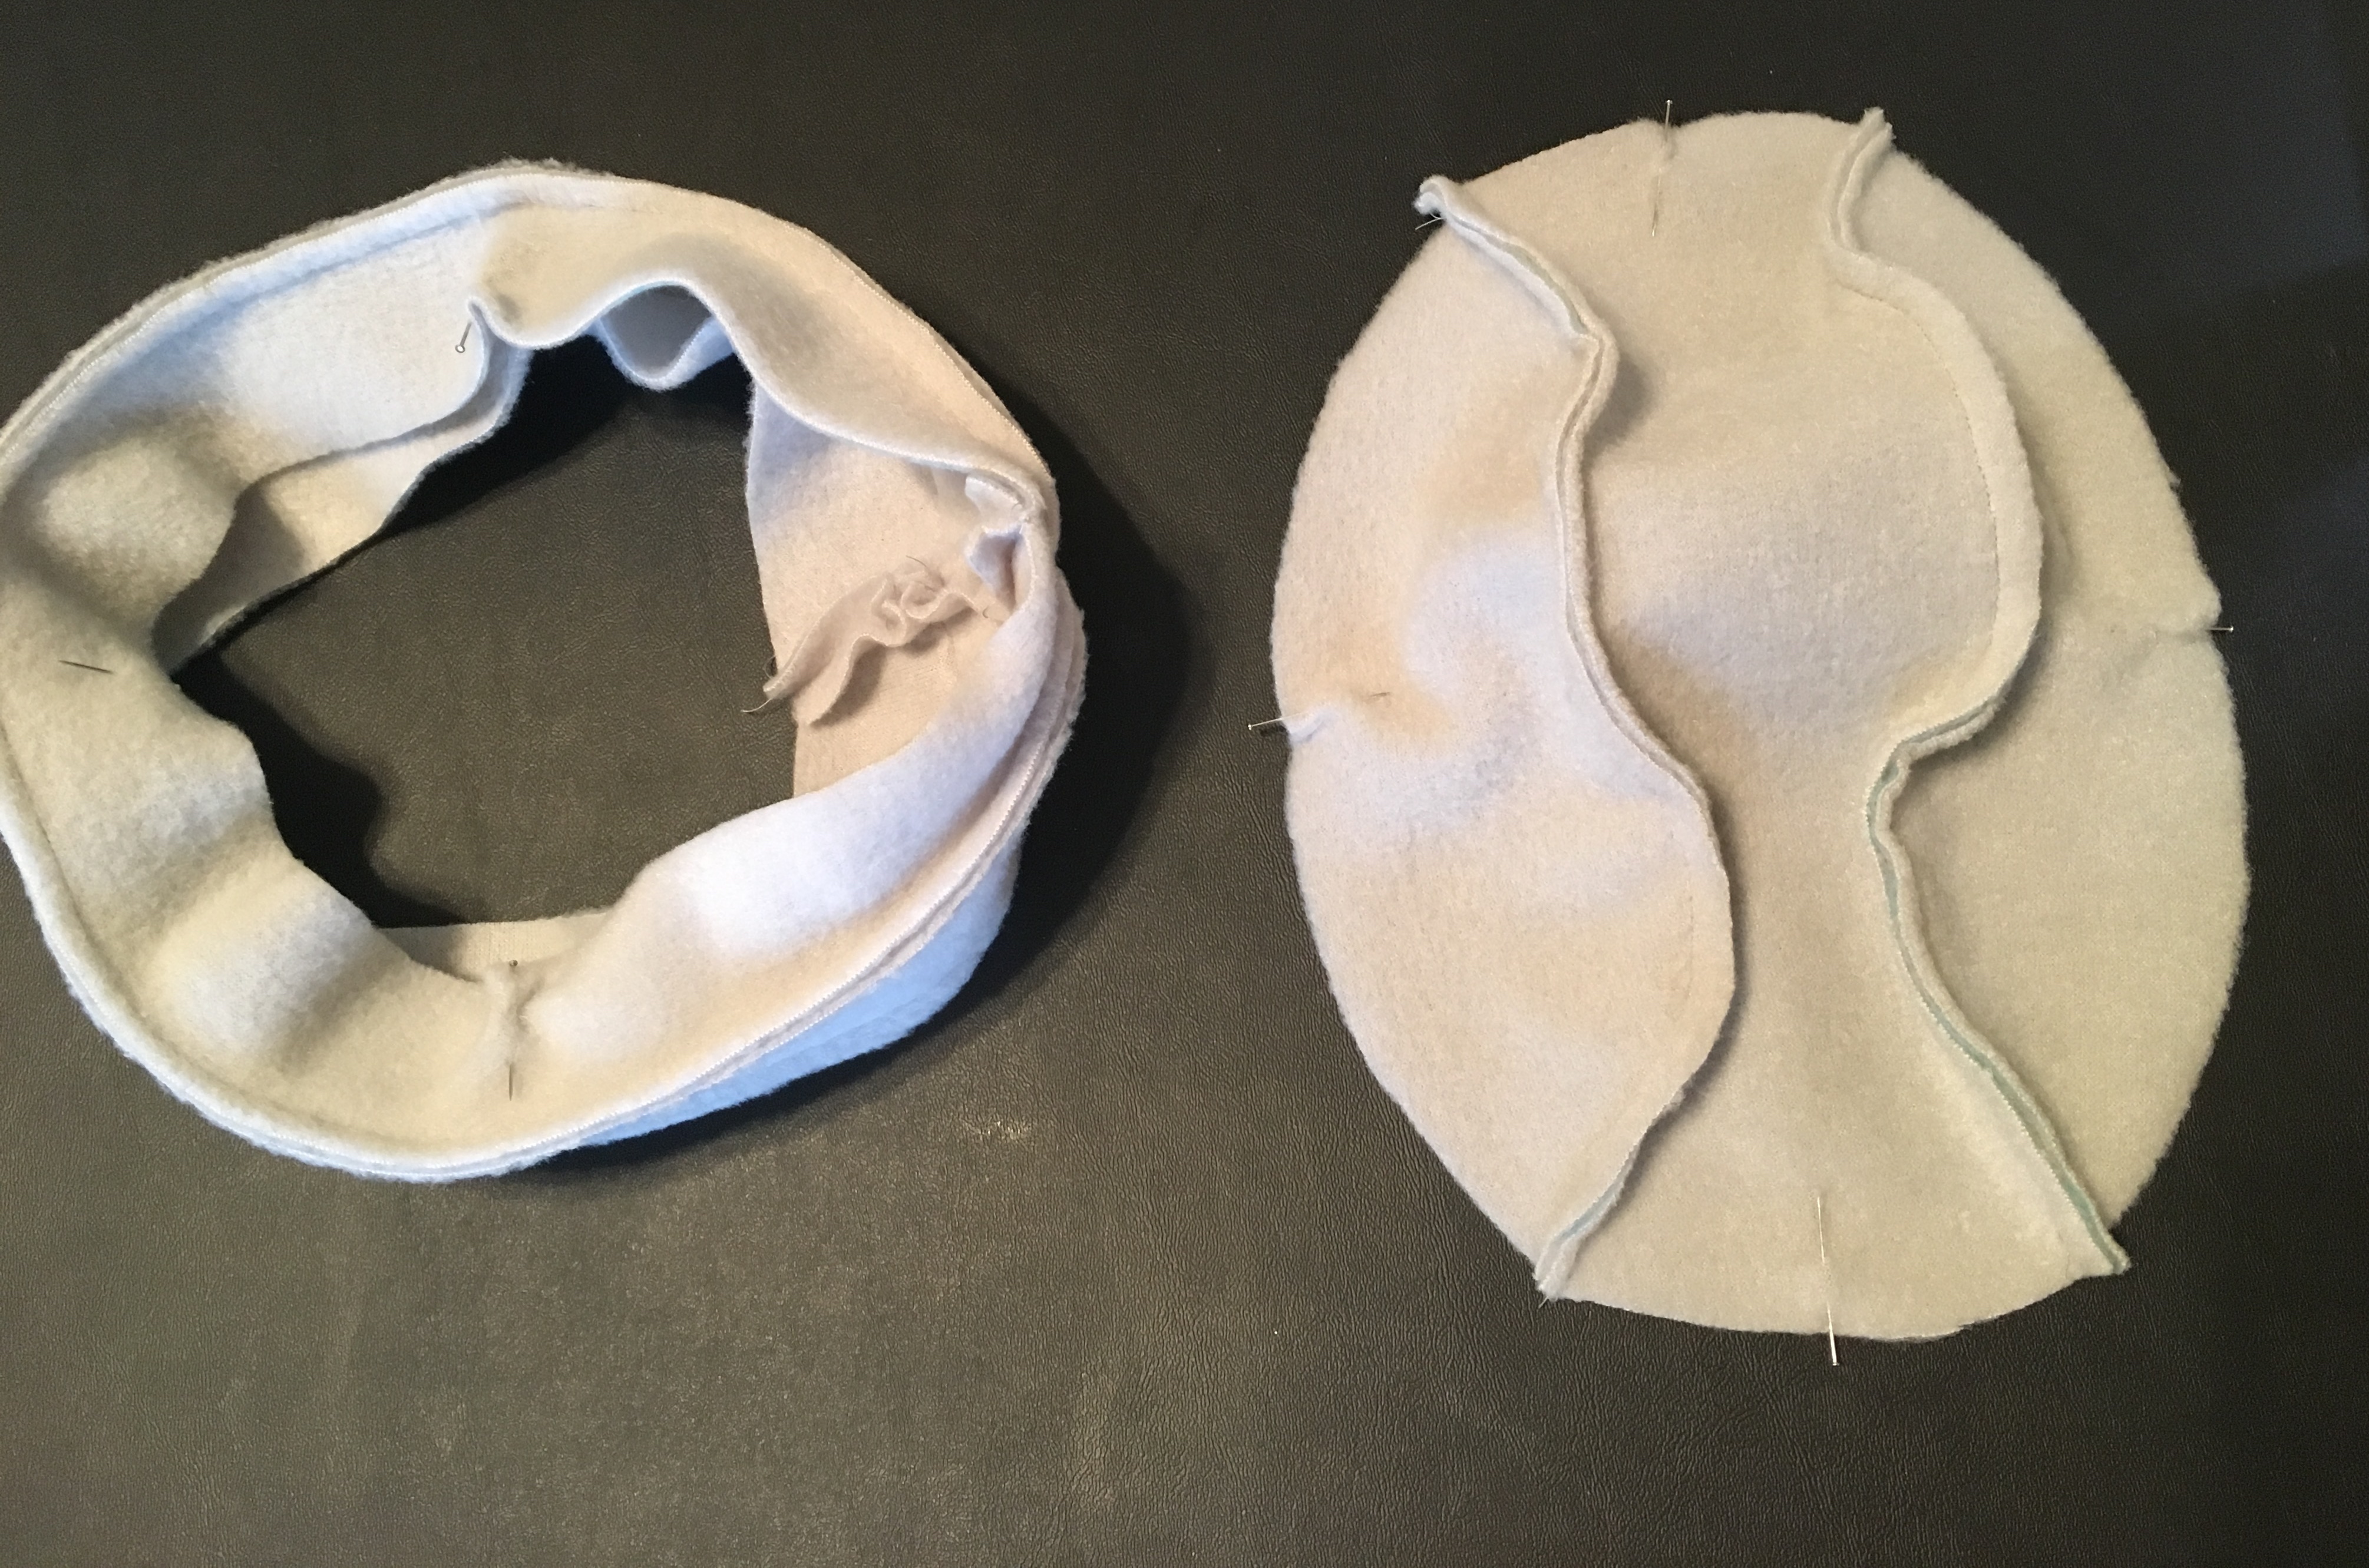
- Pin 2 of the A pieces along the long side, wrong sides together. Fleece moves, so whenever you are pinning, be sure to match the ends first, then the center, then fill in. Sew with a 1/2″ seam.
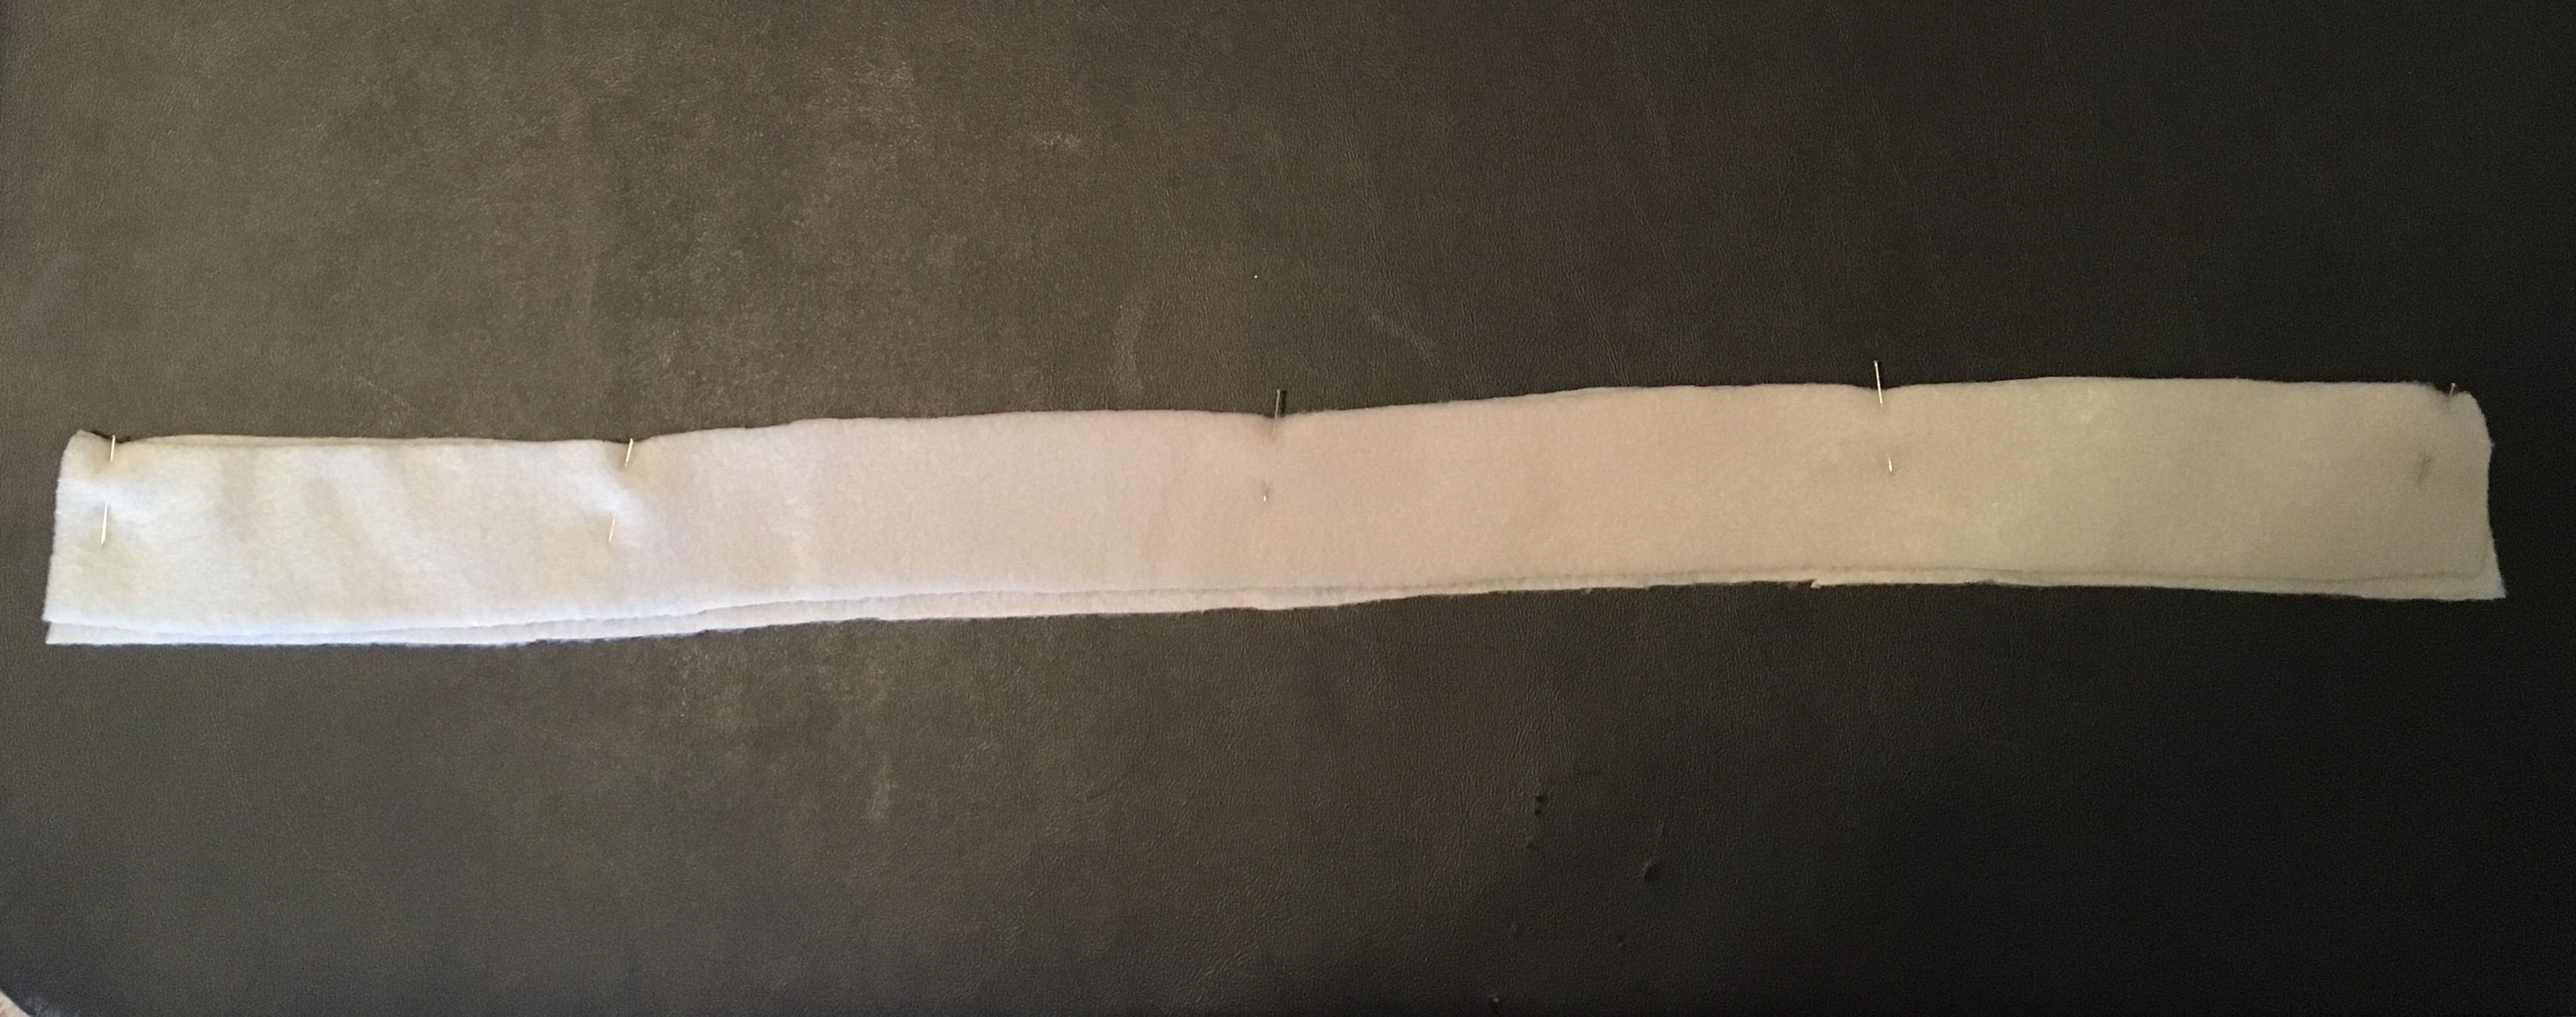
- Pin the 3rd A piece to the other 2 sewn pieces, wrong sides together, and sew to attach the same way.
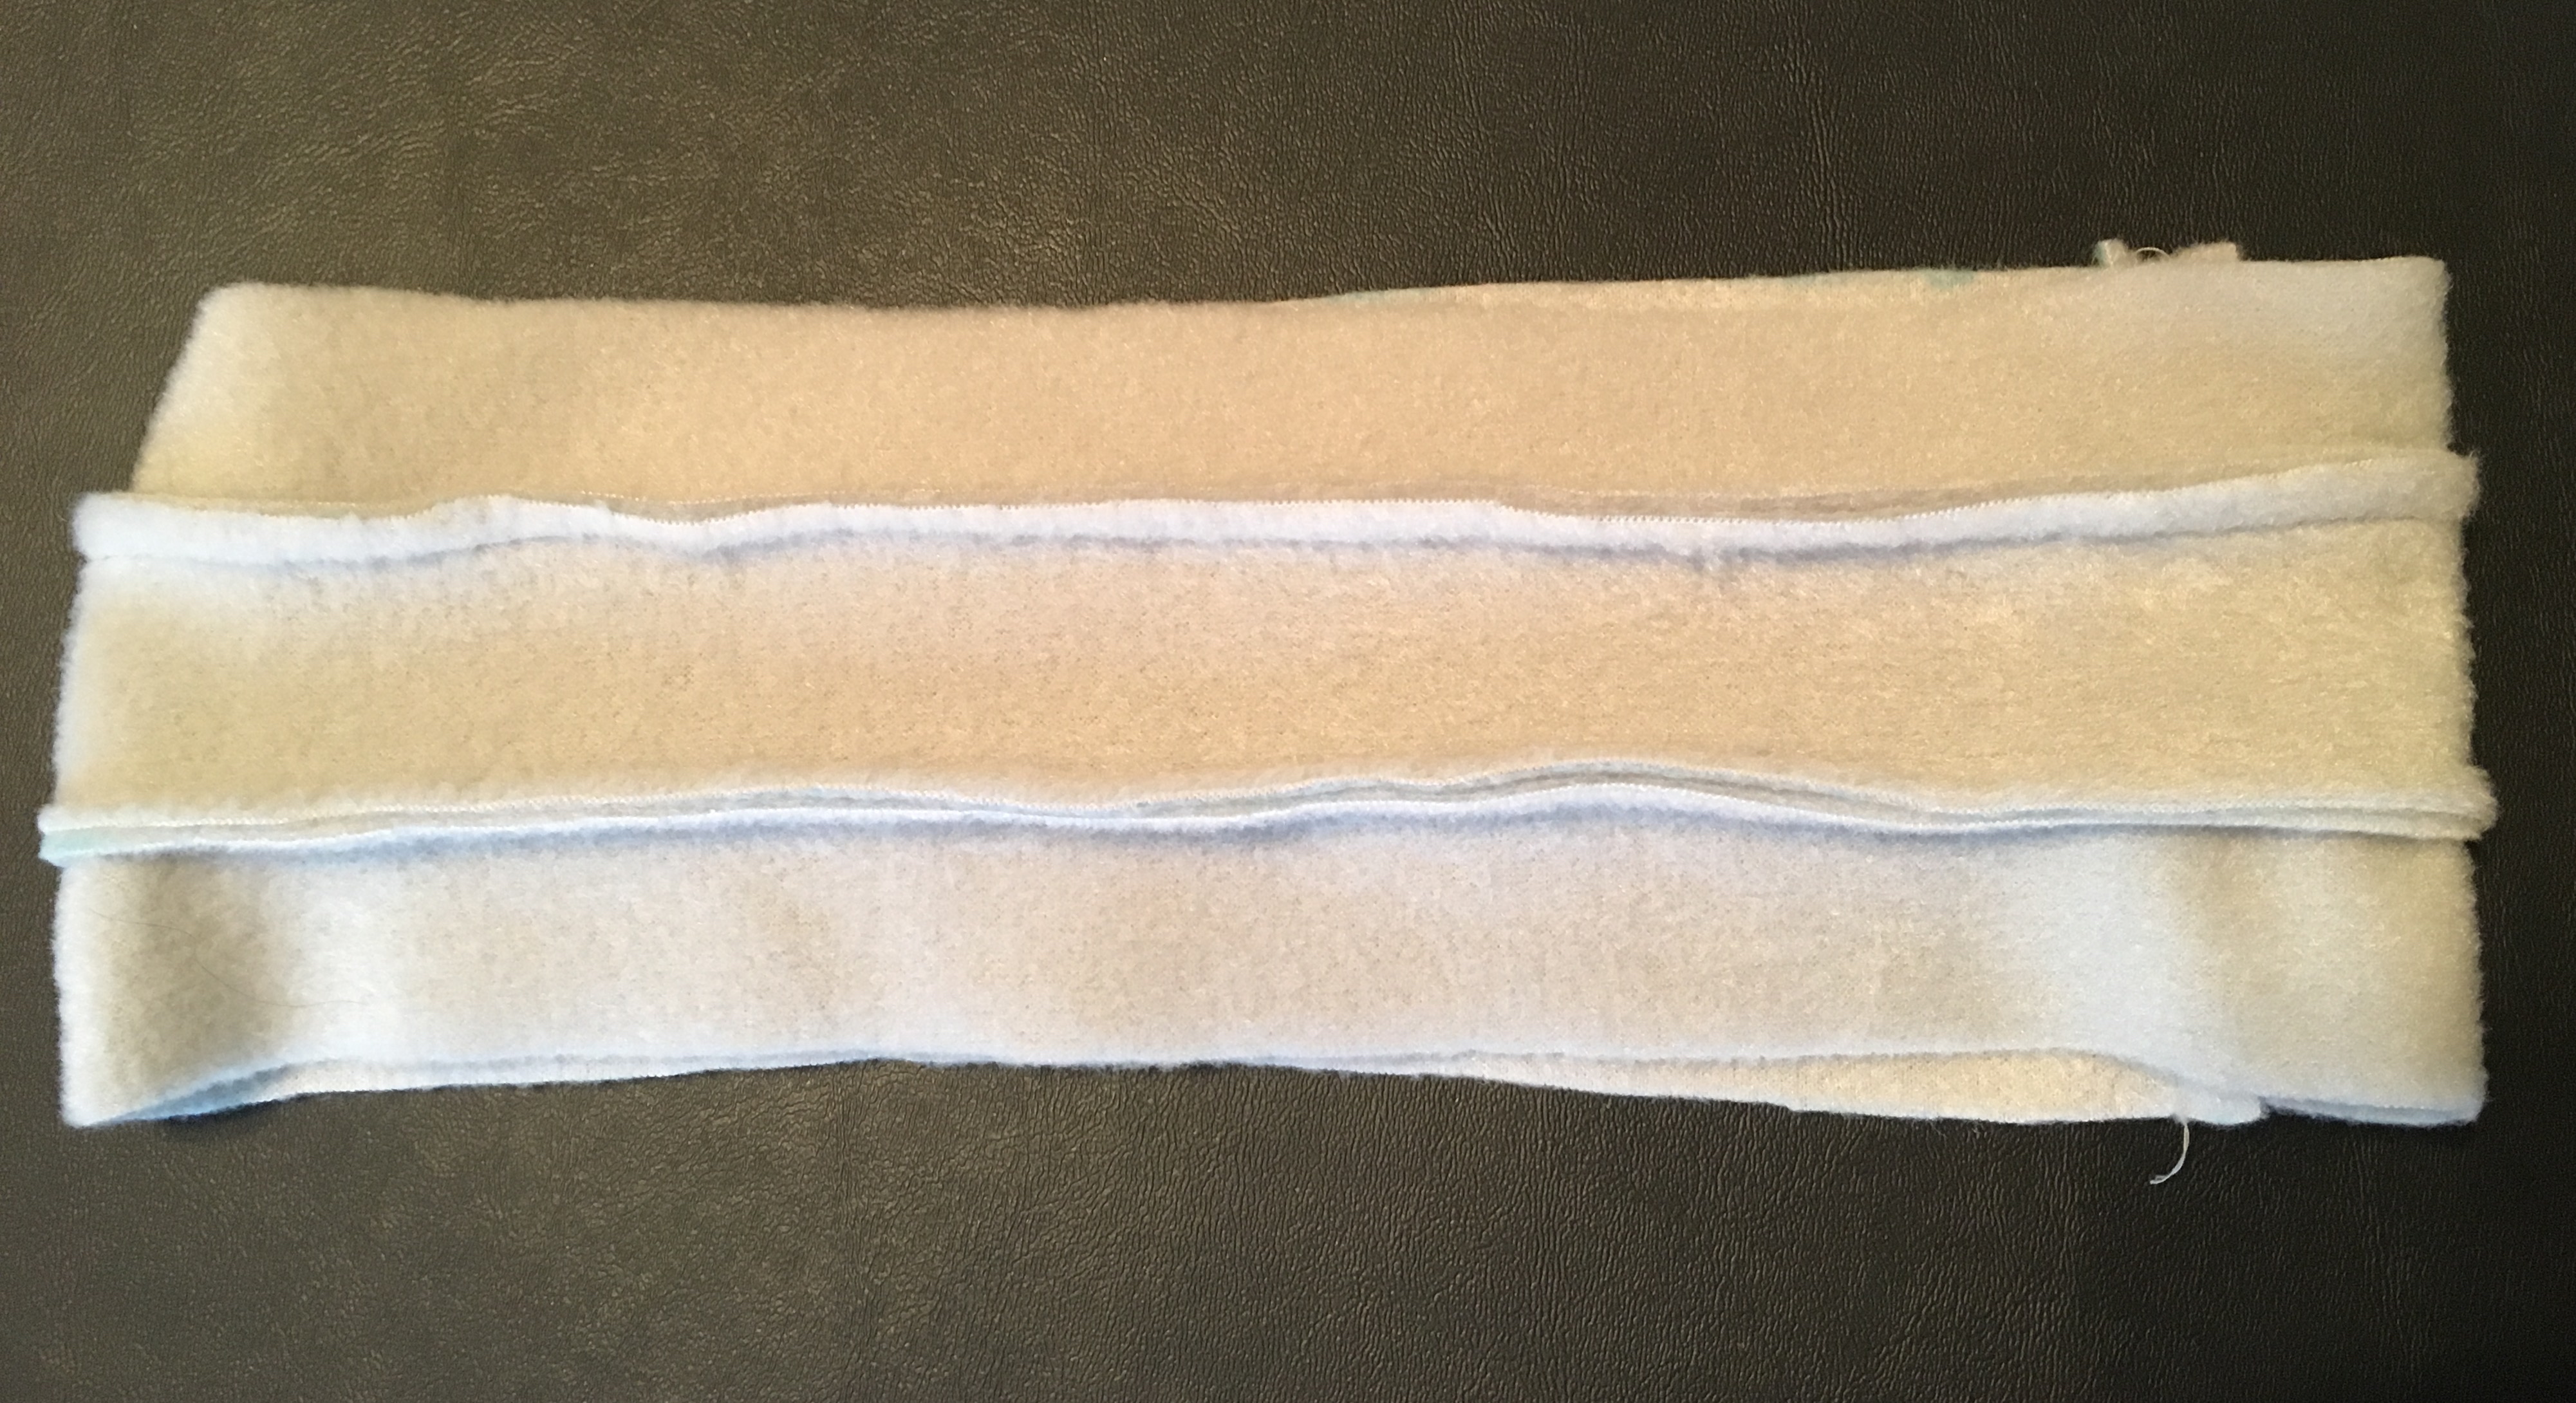
 When the 3 pieces are sewn, the right side of the band will look like this:
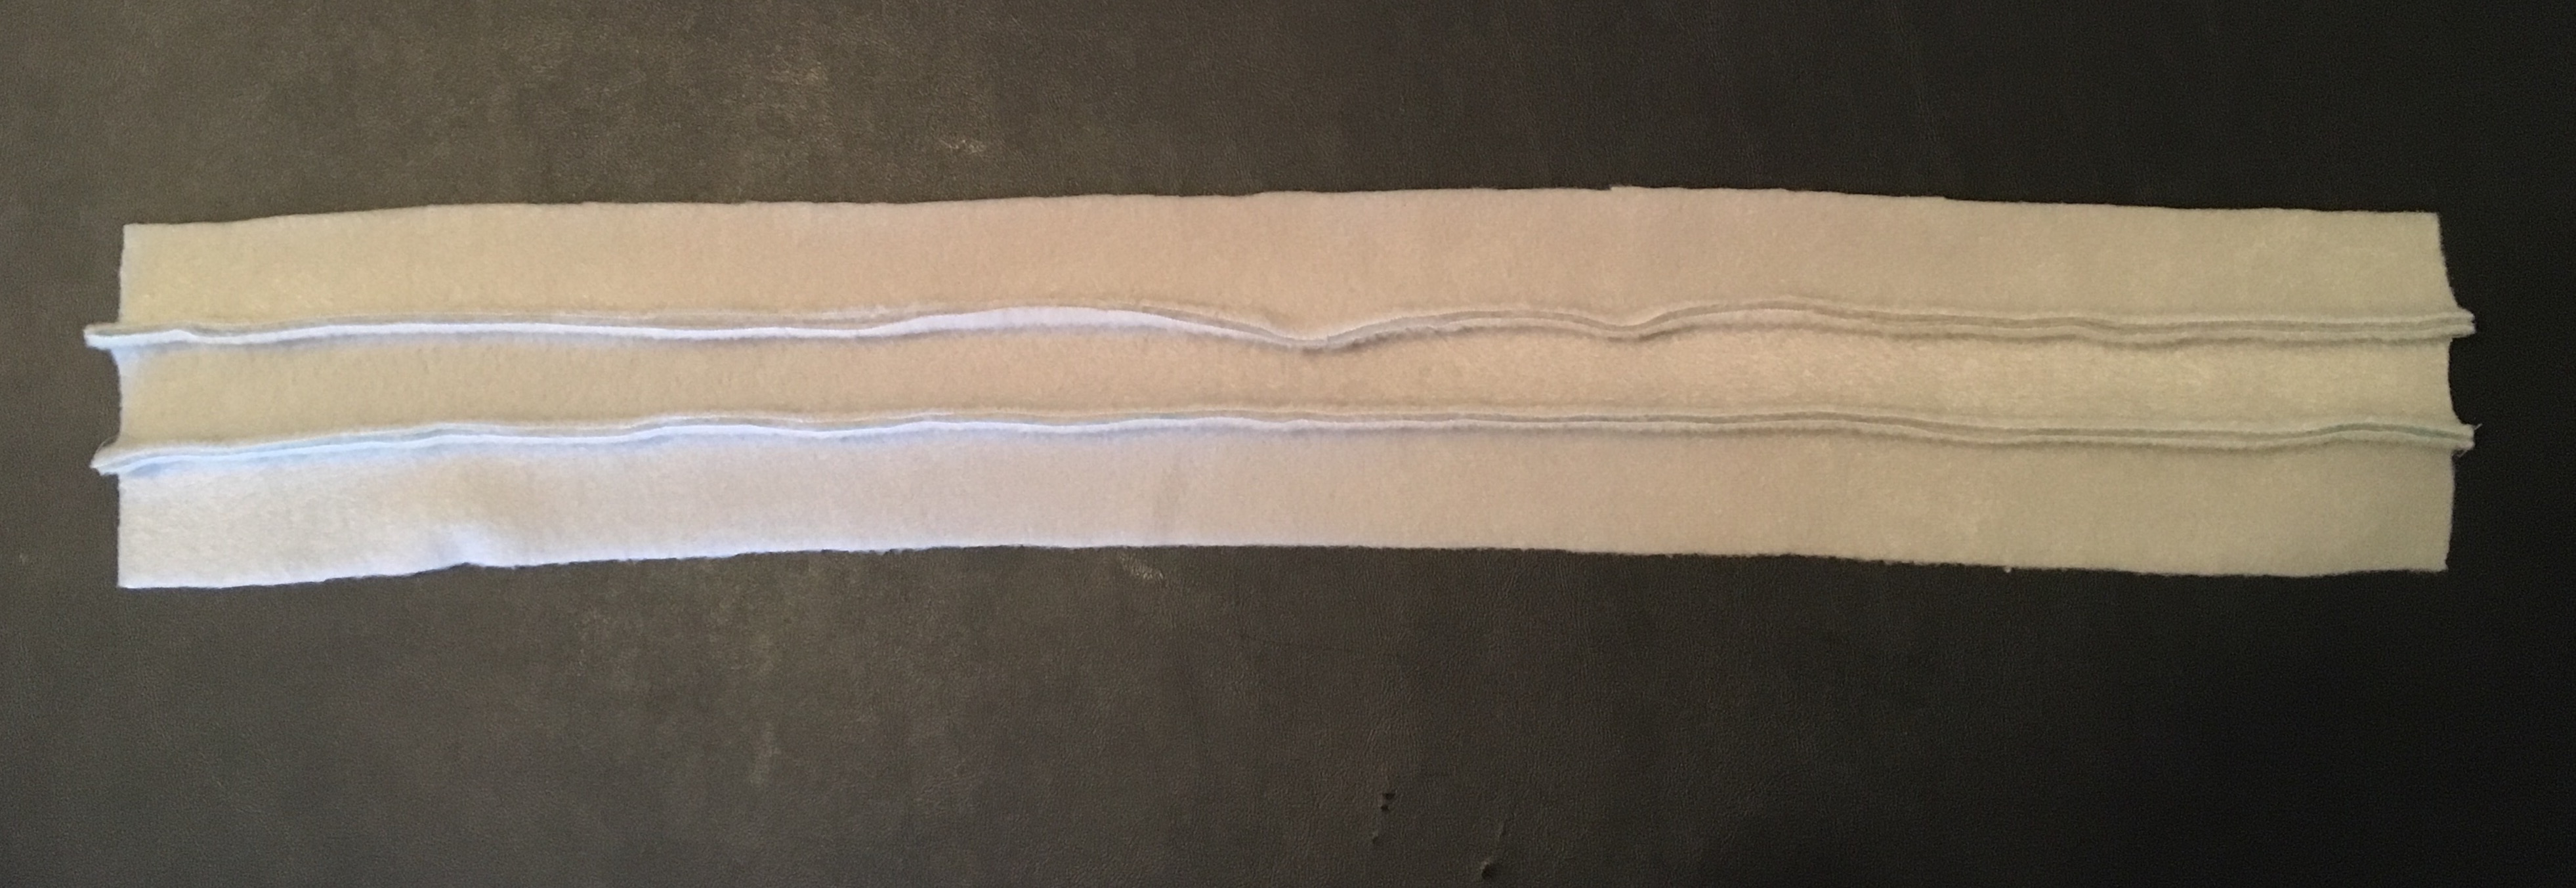
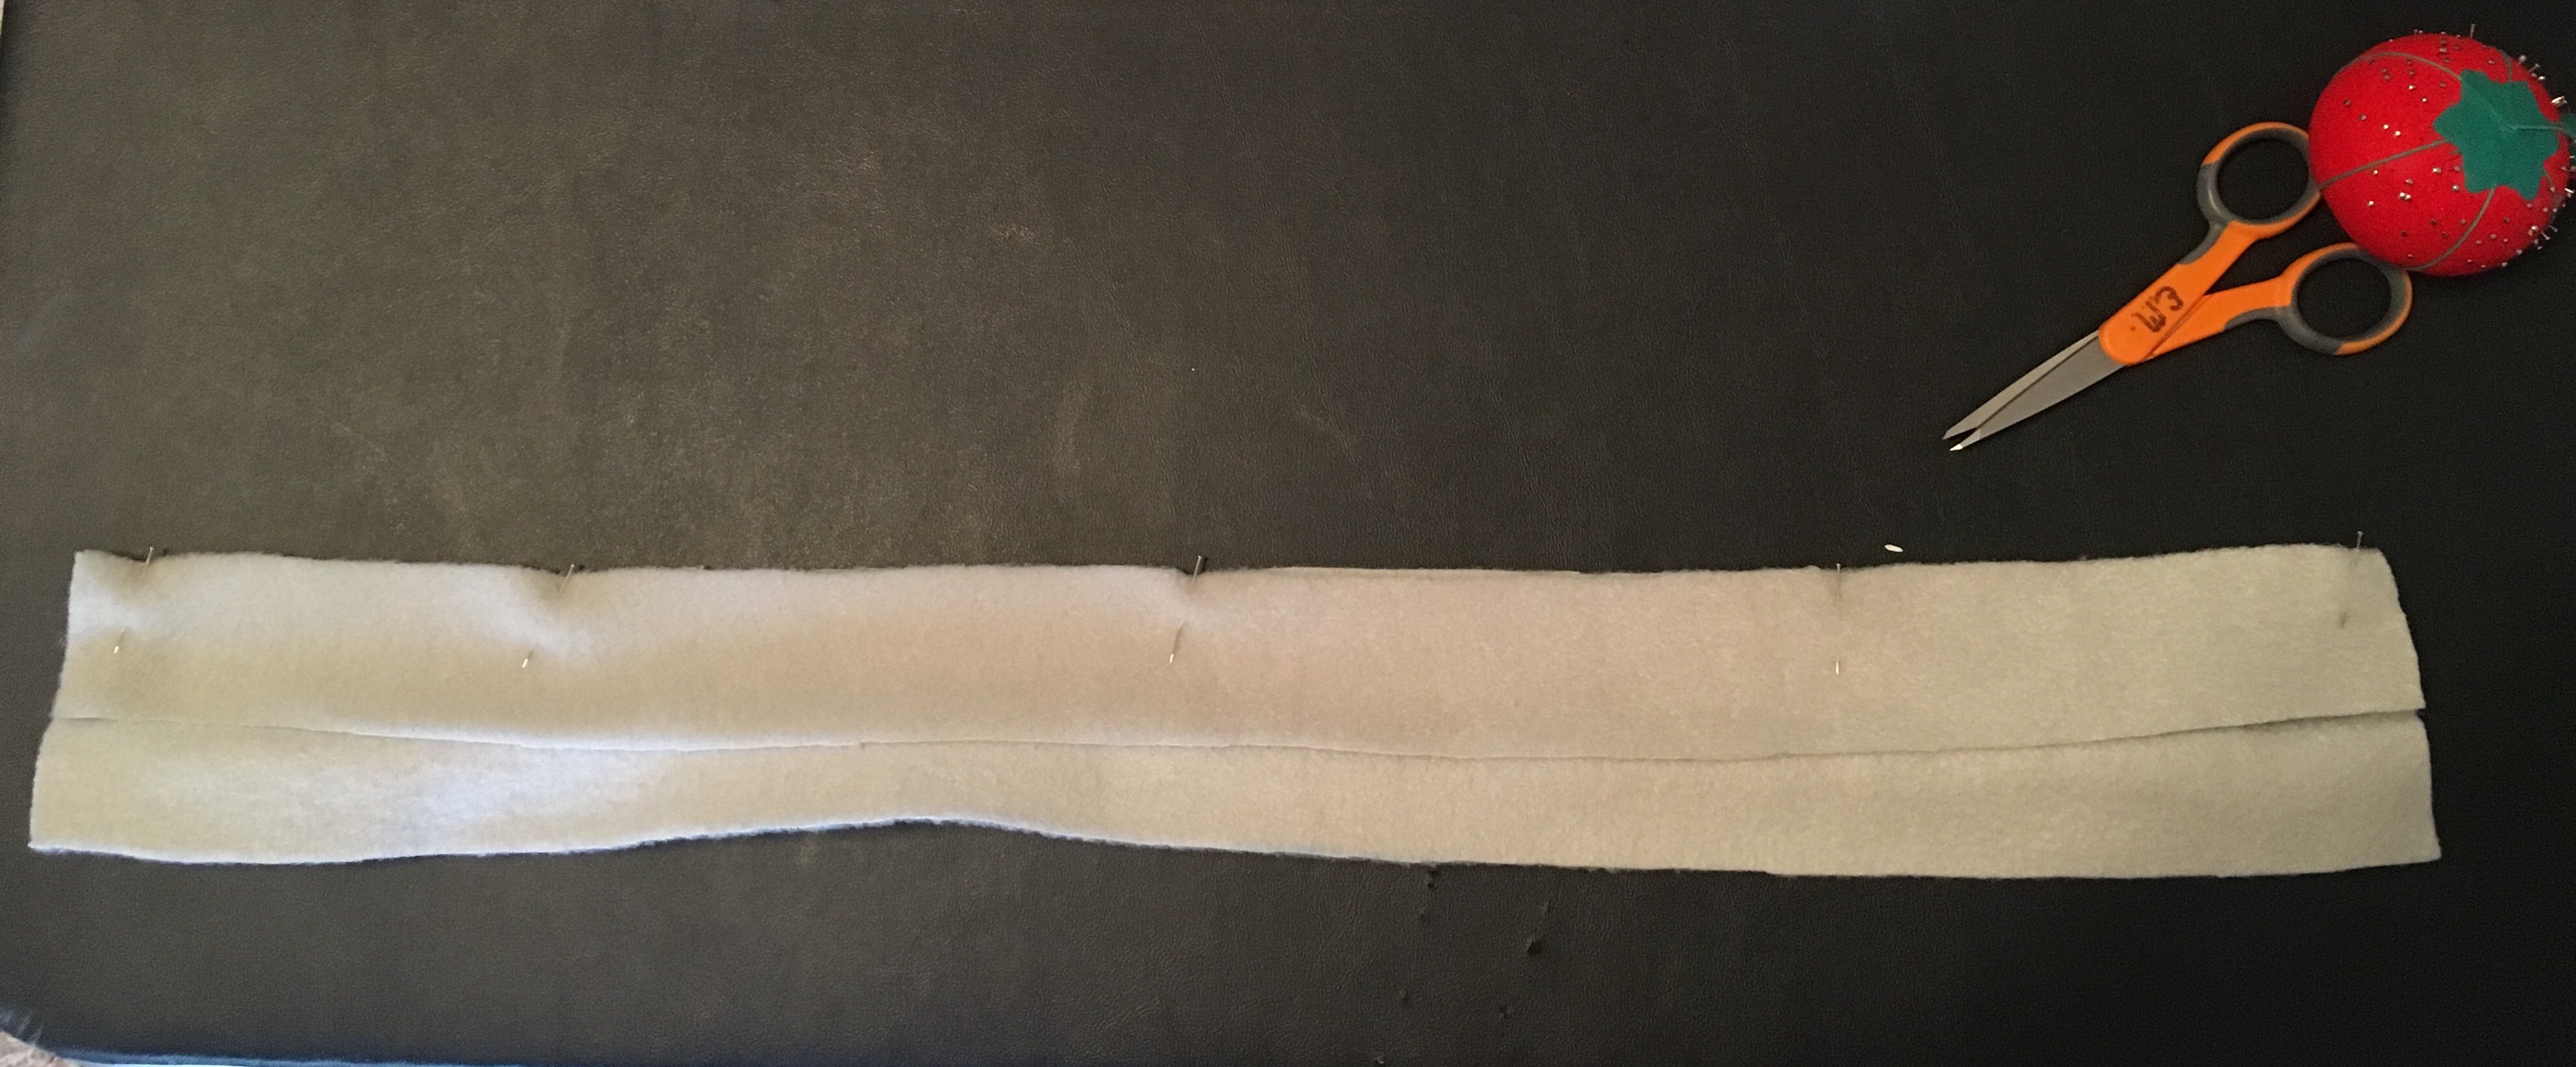
- Fold the whole thing in half by width, right sides together. Match the seams and pin it.
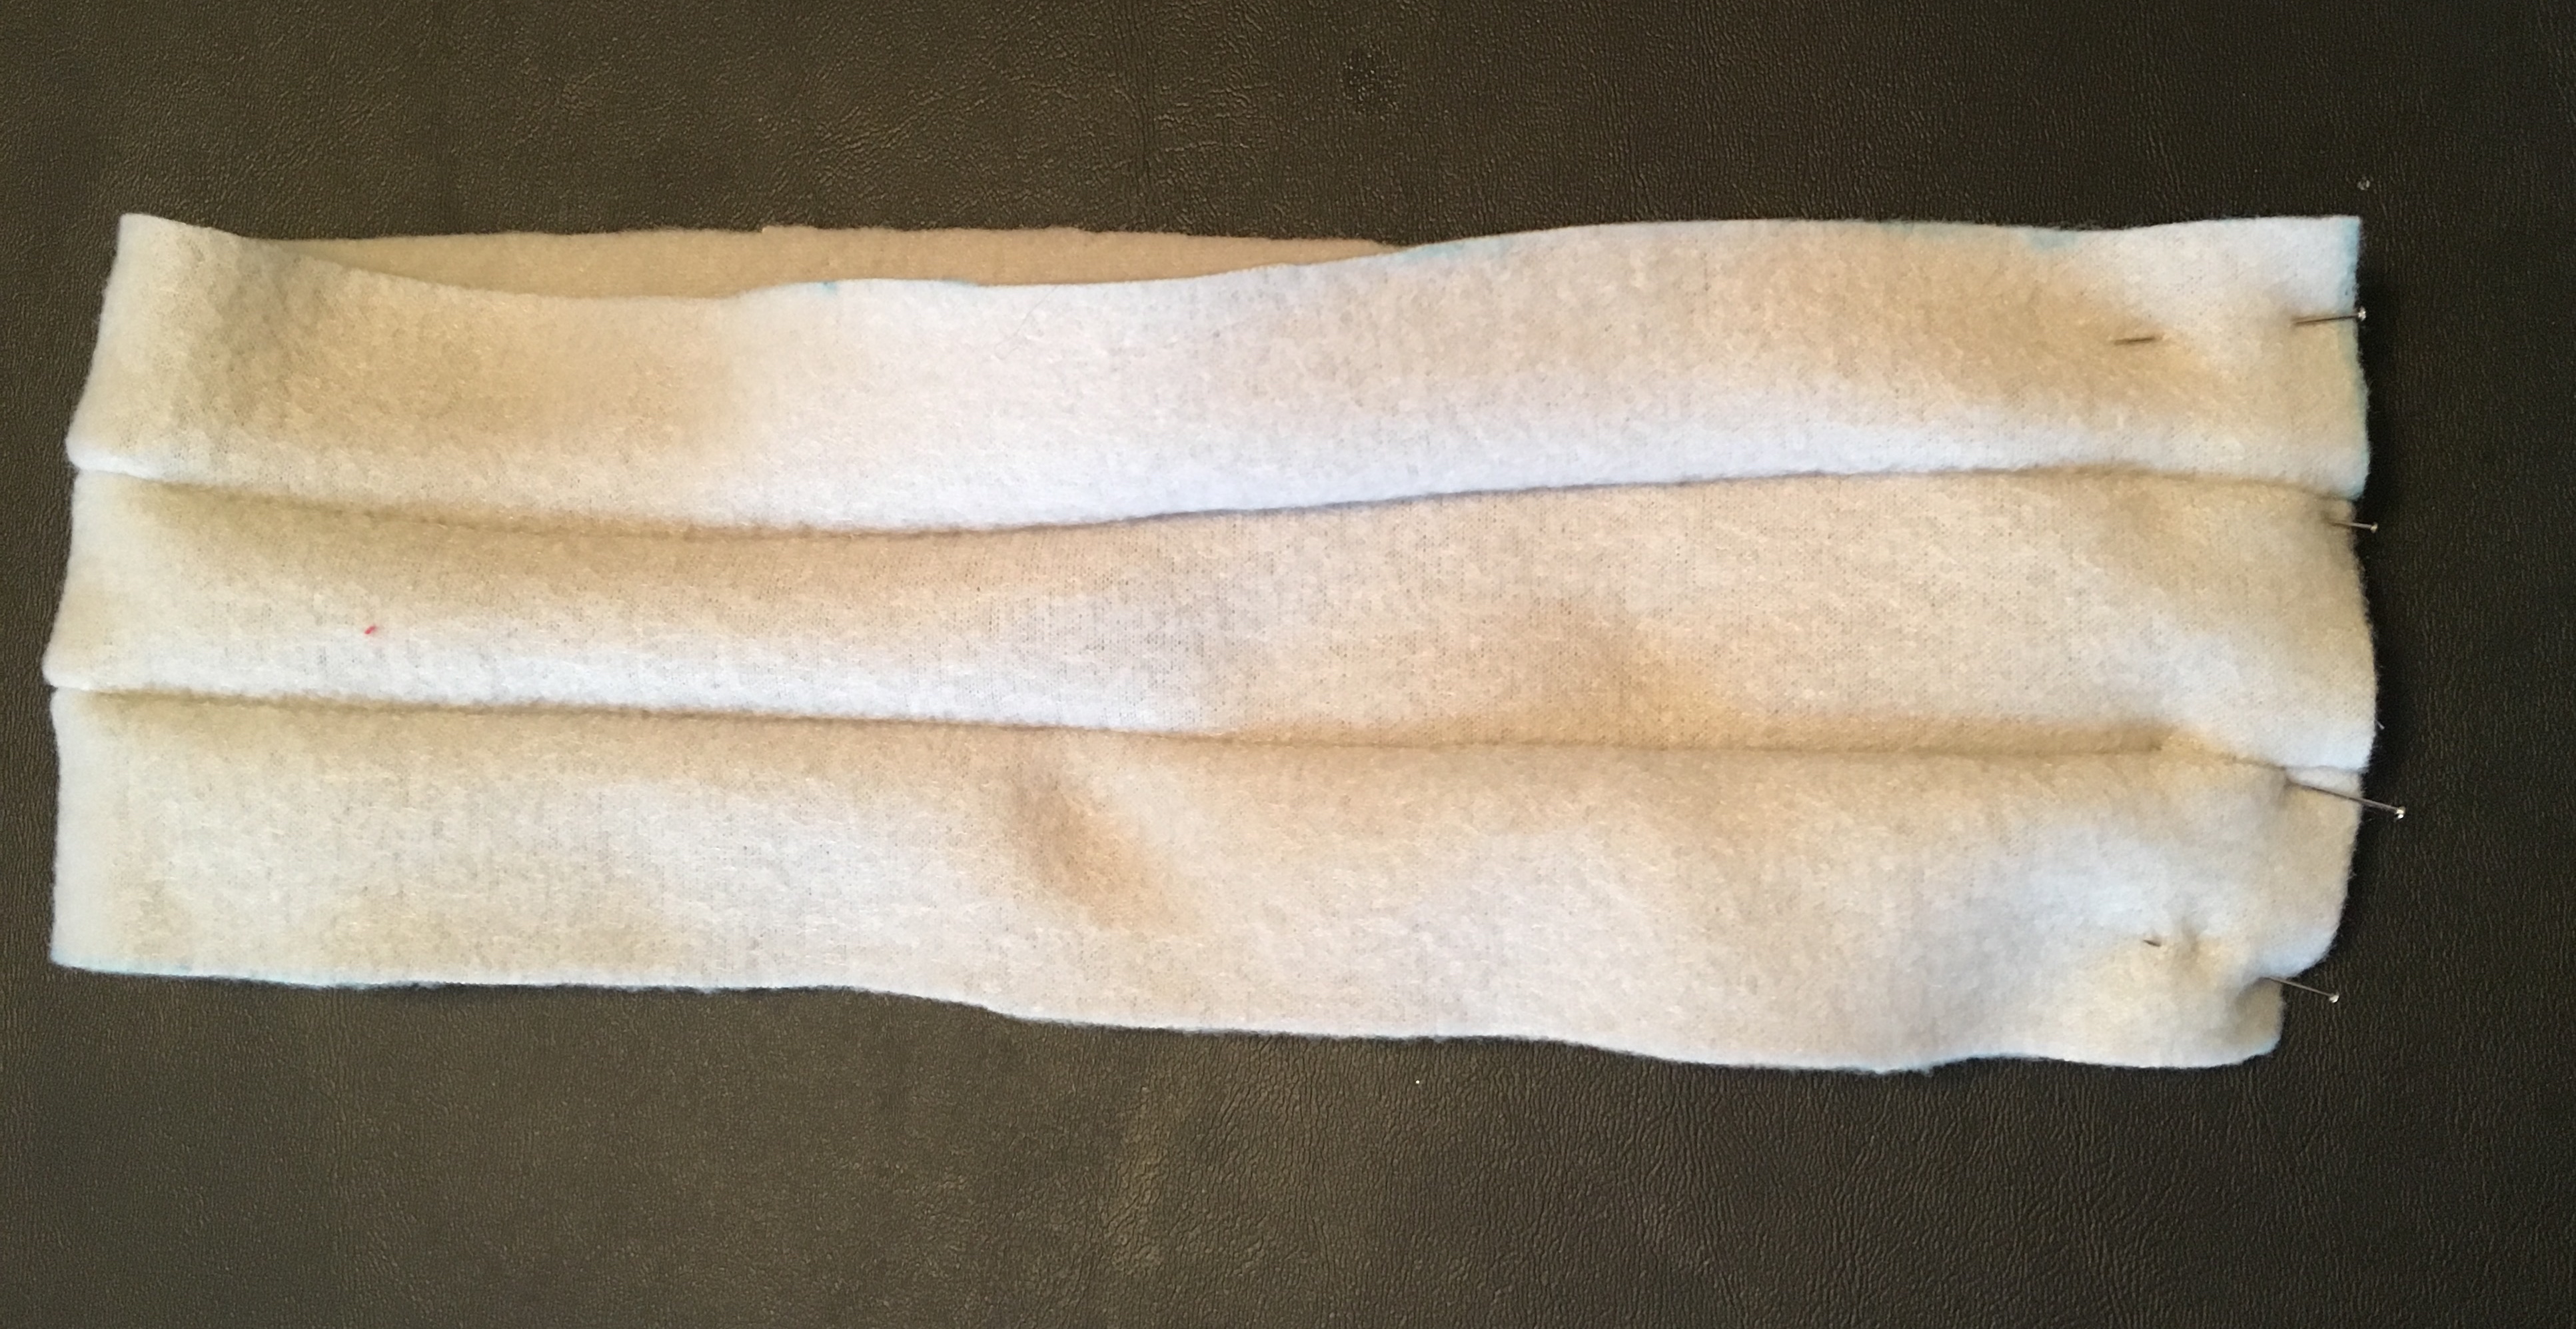
- Sew with a 1/2″ seam to complete the band. Press open the seam. Then turn rightside-out. Be sure all the sidestrip seams fold down
Making the top:
- Pin the more arched side of one of the B pieces to one side of the C piece, wrong sides together. Match the ends, and then follow the curve around. Sew with a 1/2″seam.
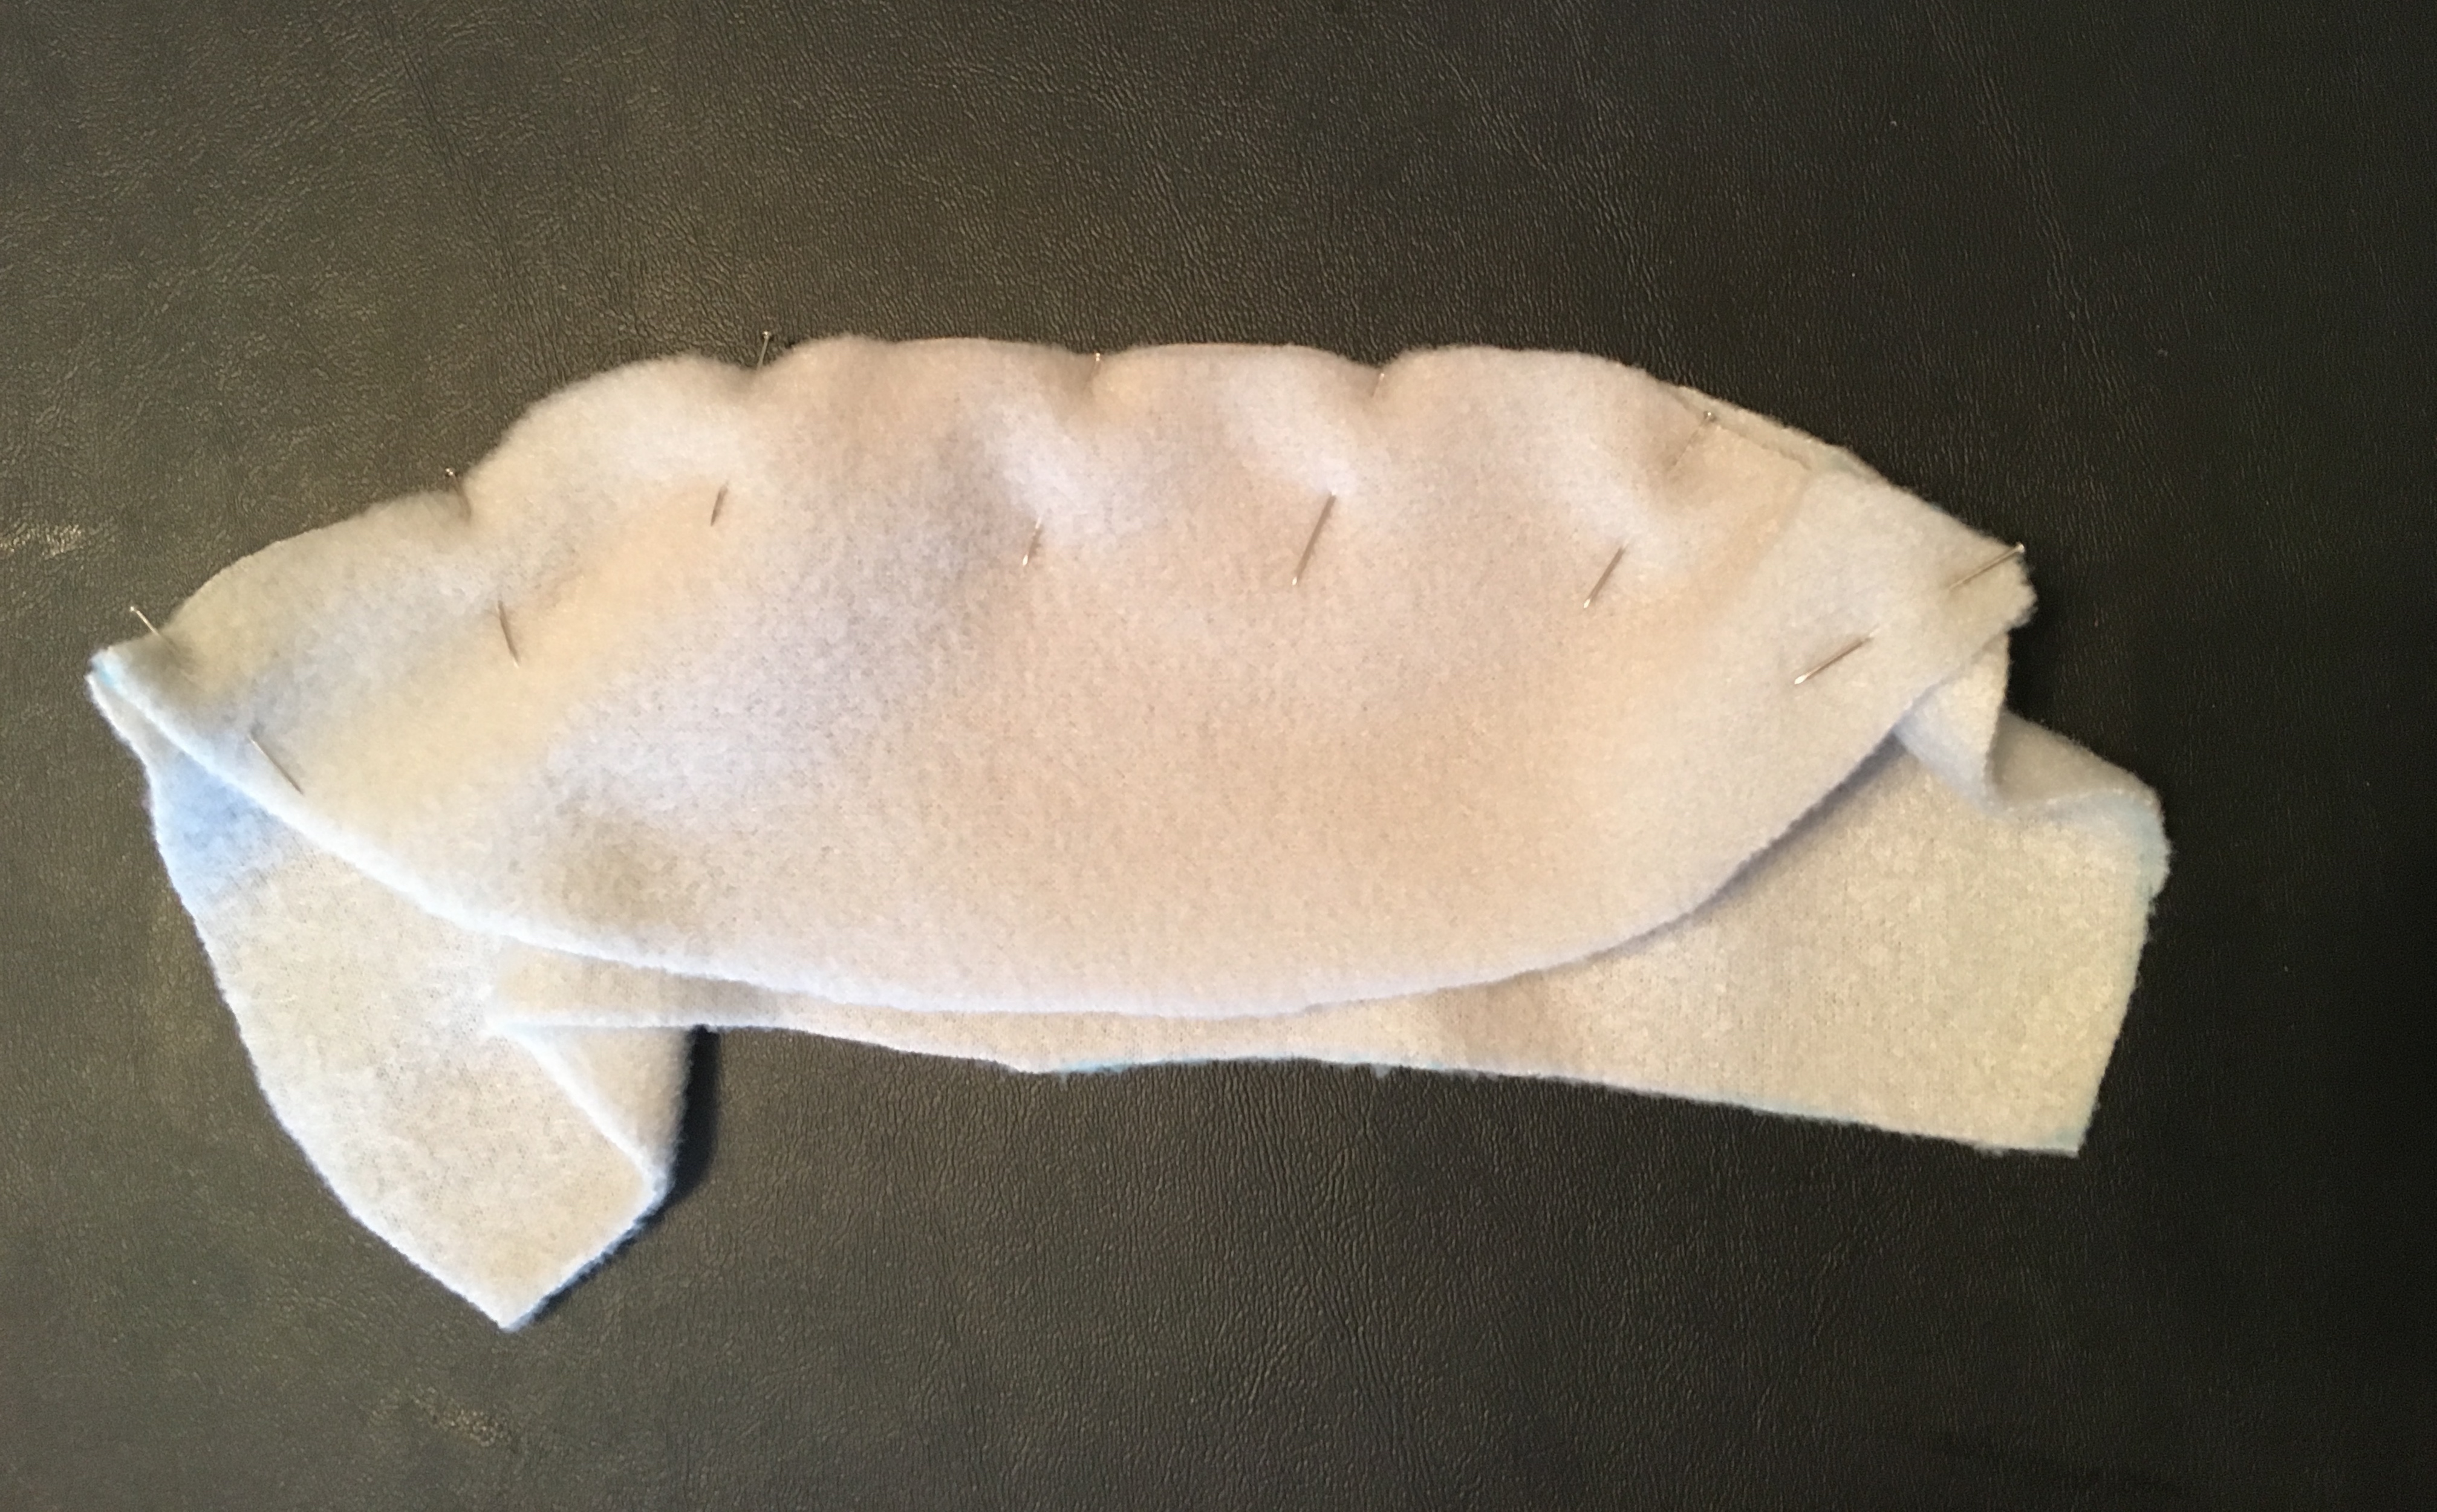
- Repeat on the other side of the C piece – Pin the other B piece to the other side of the C piece, wrong sides together, matching ends first and following the curve around. Sew to attach the same way, with a 1/2″ seam.
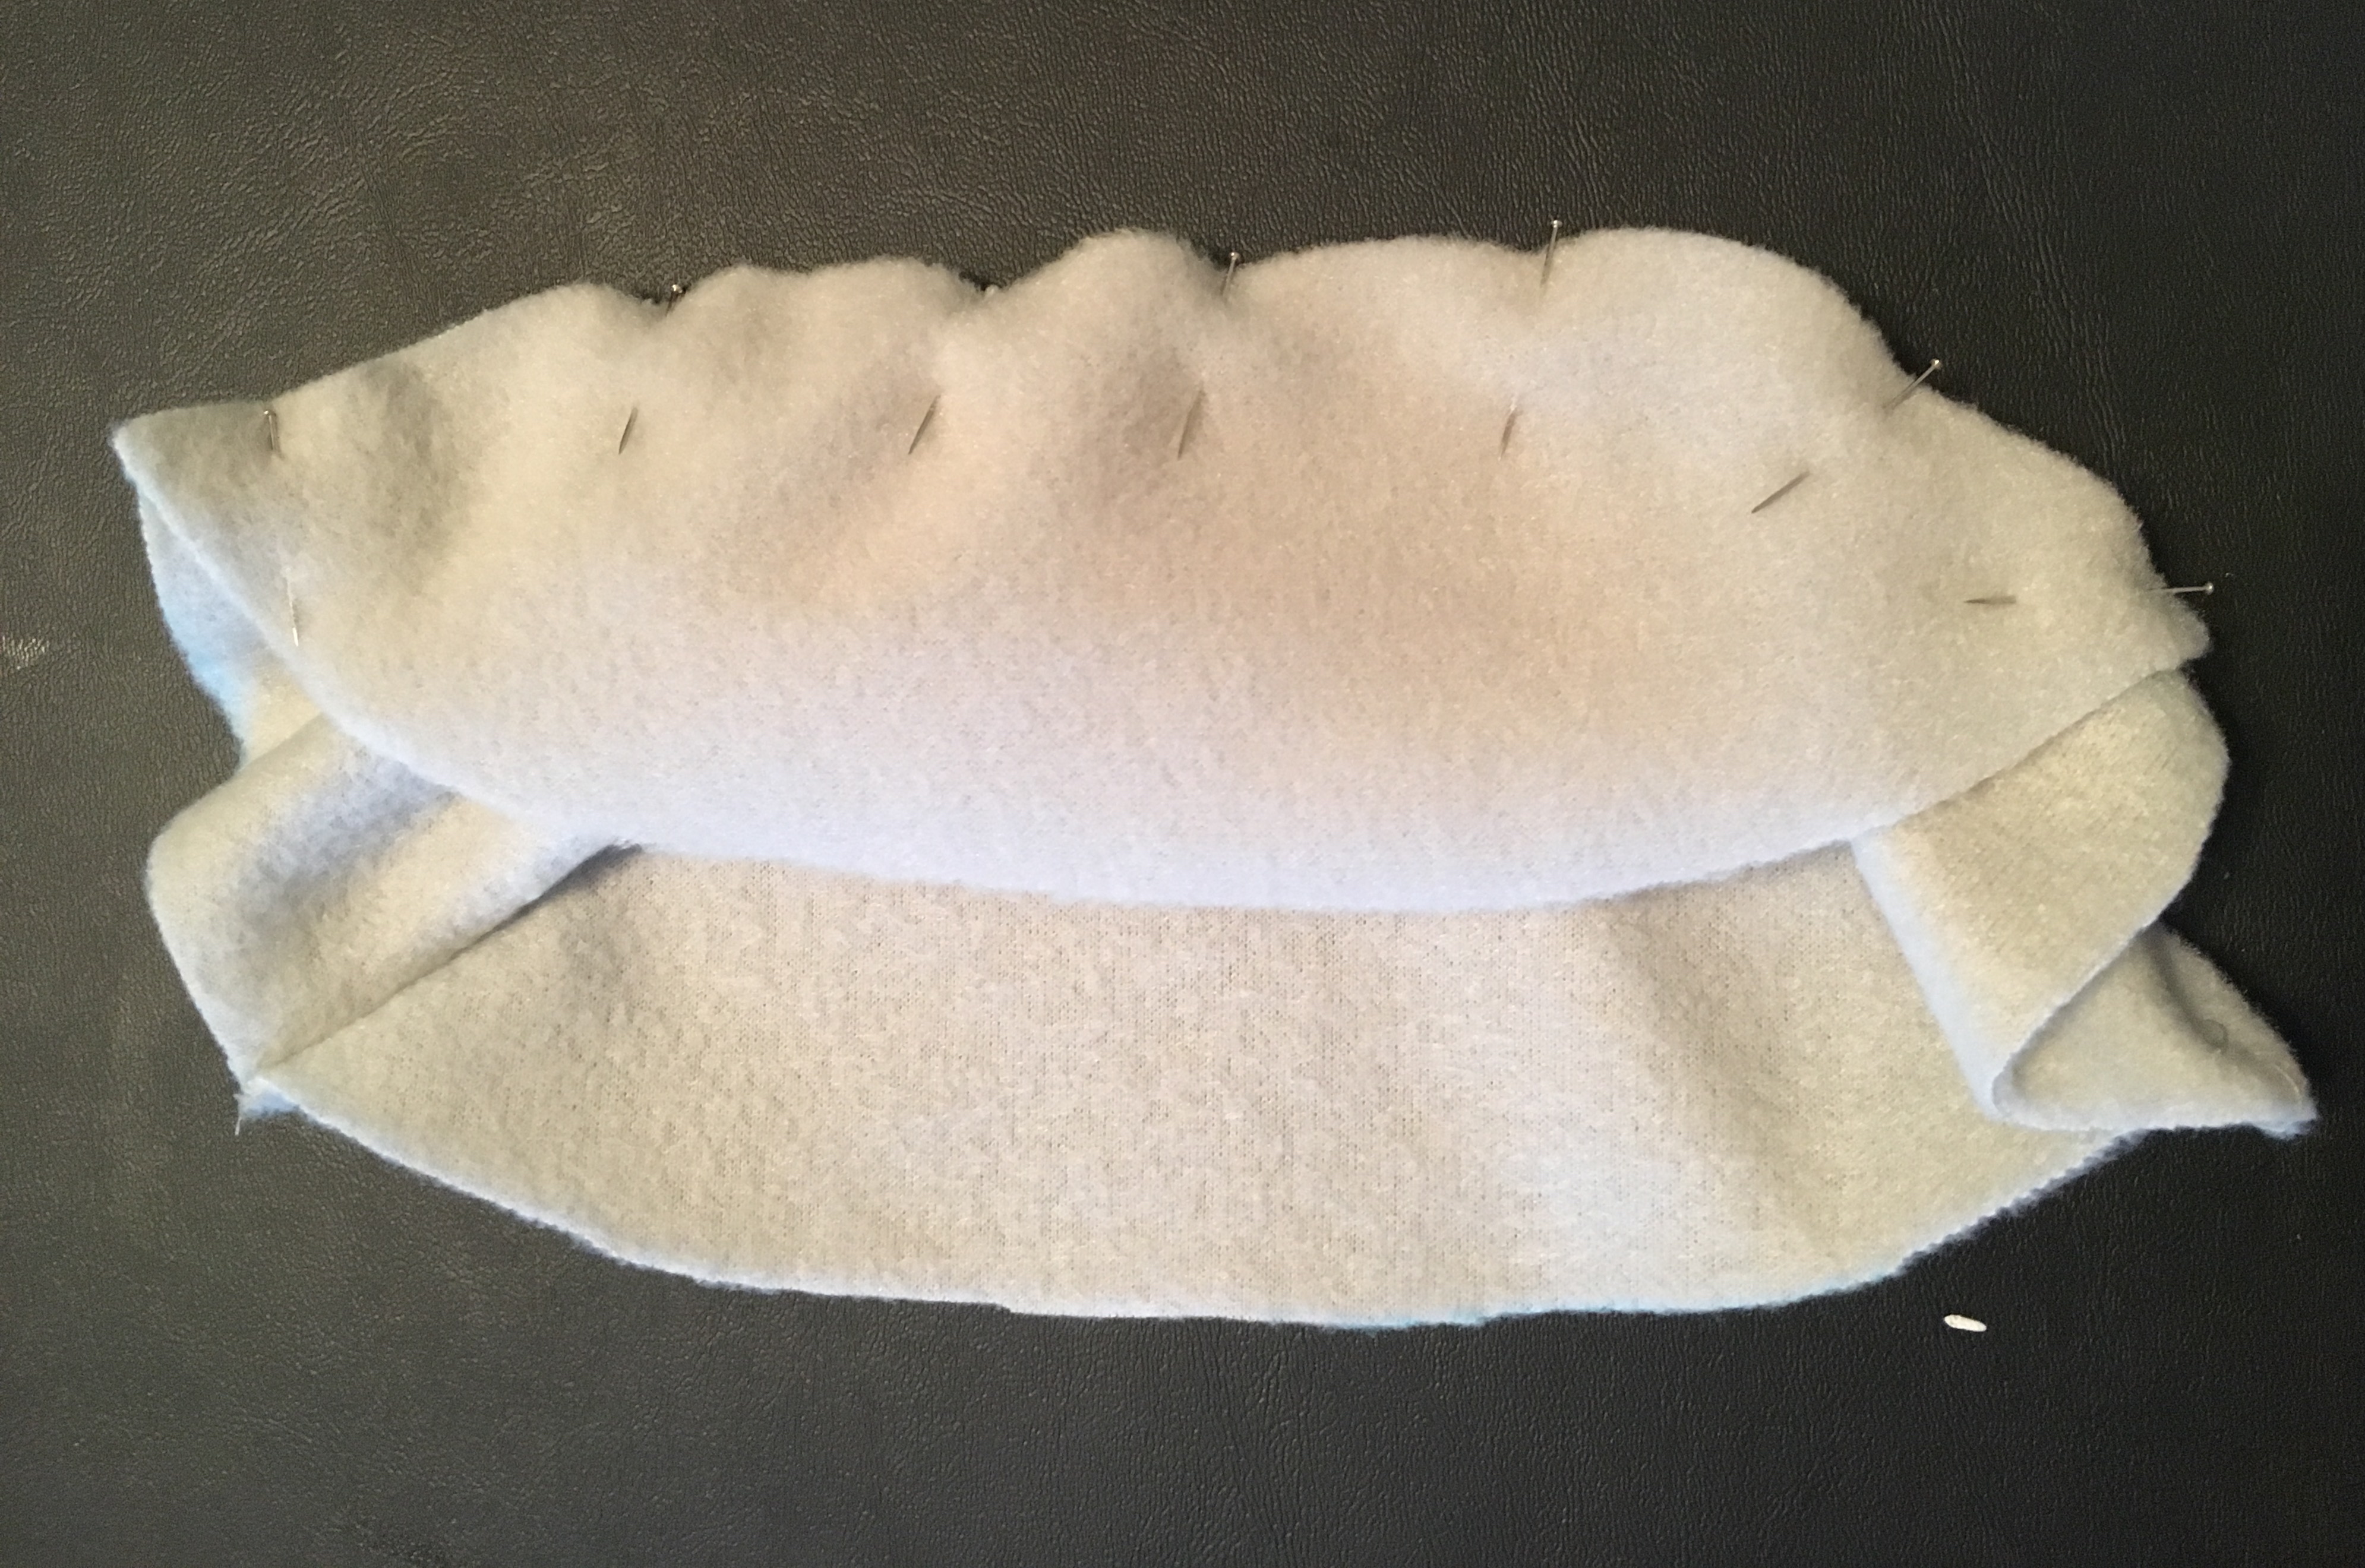
When completed, the right side of your hat top will look like this: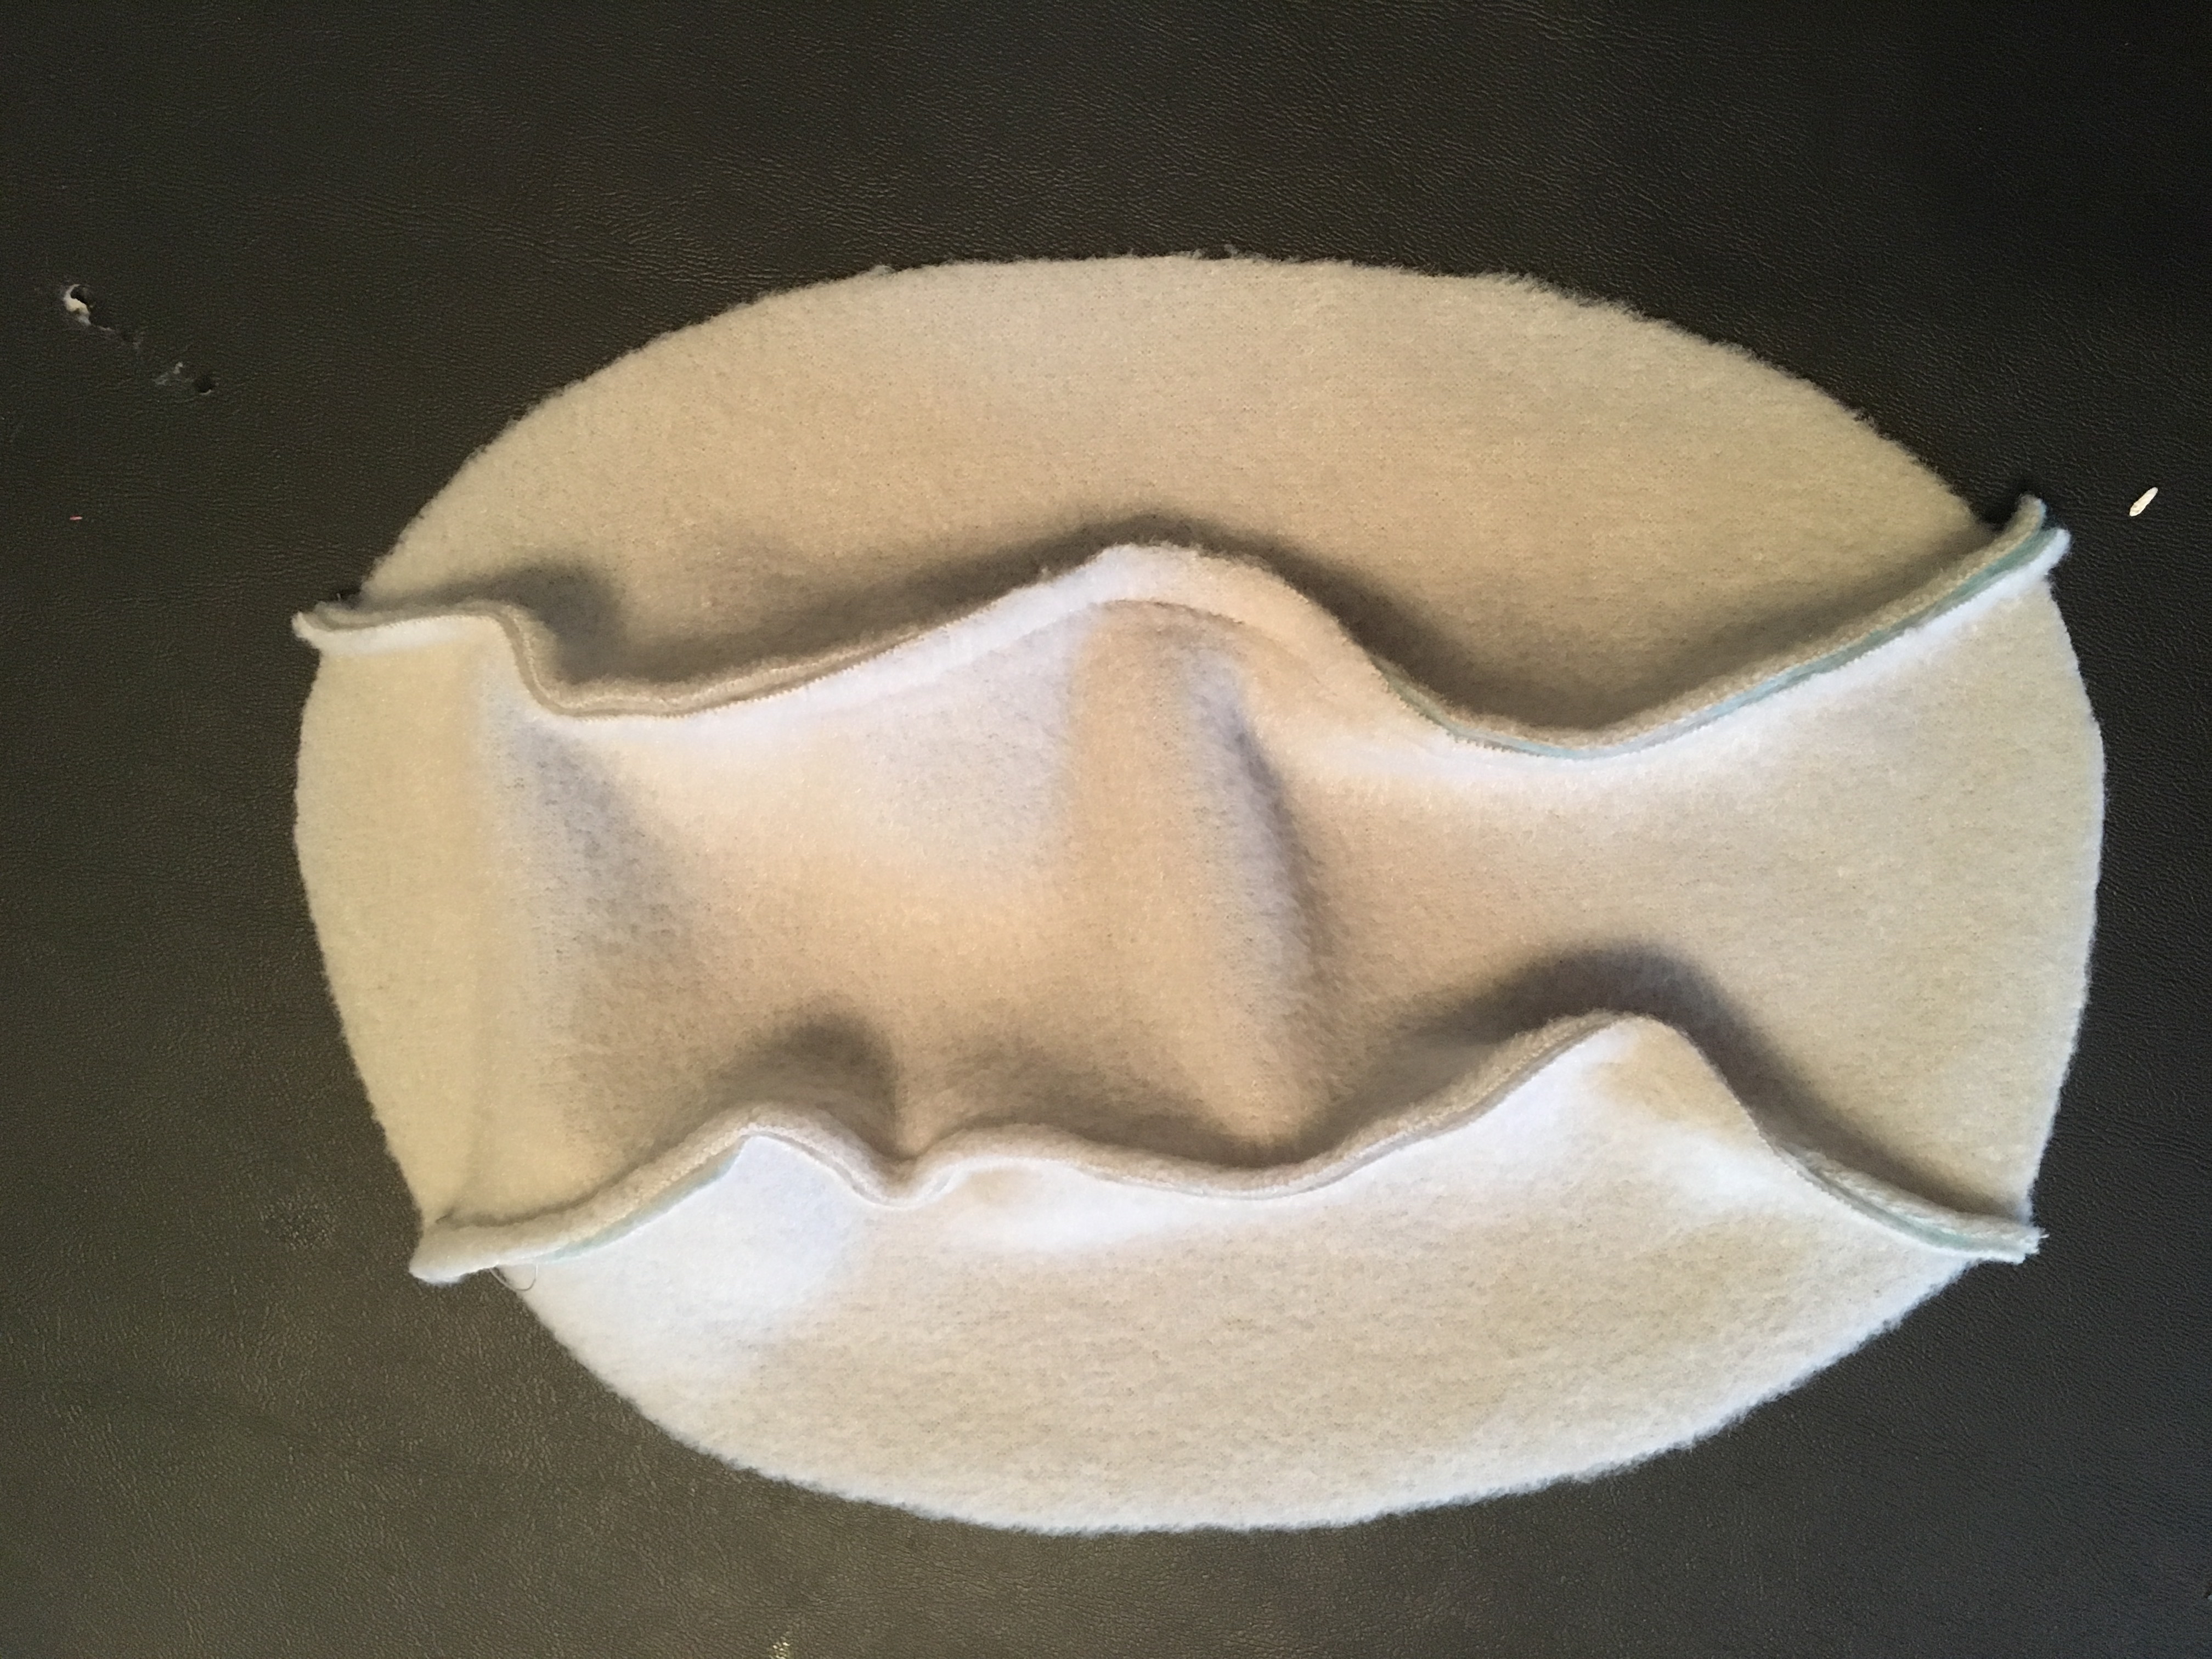
Completing your Sassy Cap:
- Find the 1/4ths around your hat band by folding it in half one way and then the other, and marking the center spots with a pin. The seam will be one of the marks on the band. Do the same for the top of your hat.
- Pin the top of the hat to the top of band, right sides together, matching 1/4ths and working in between.

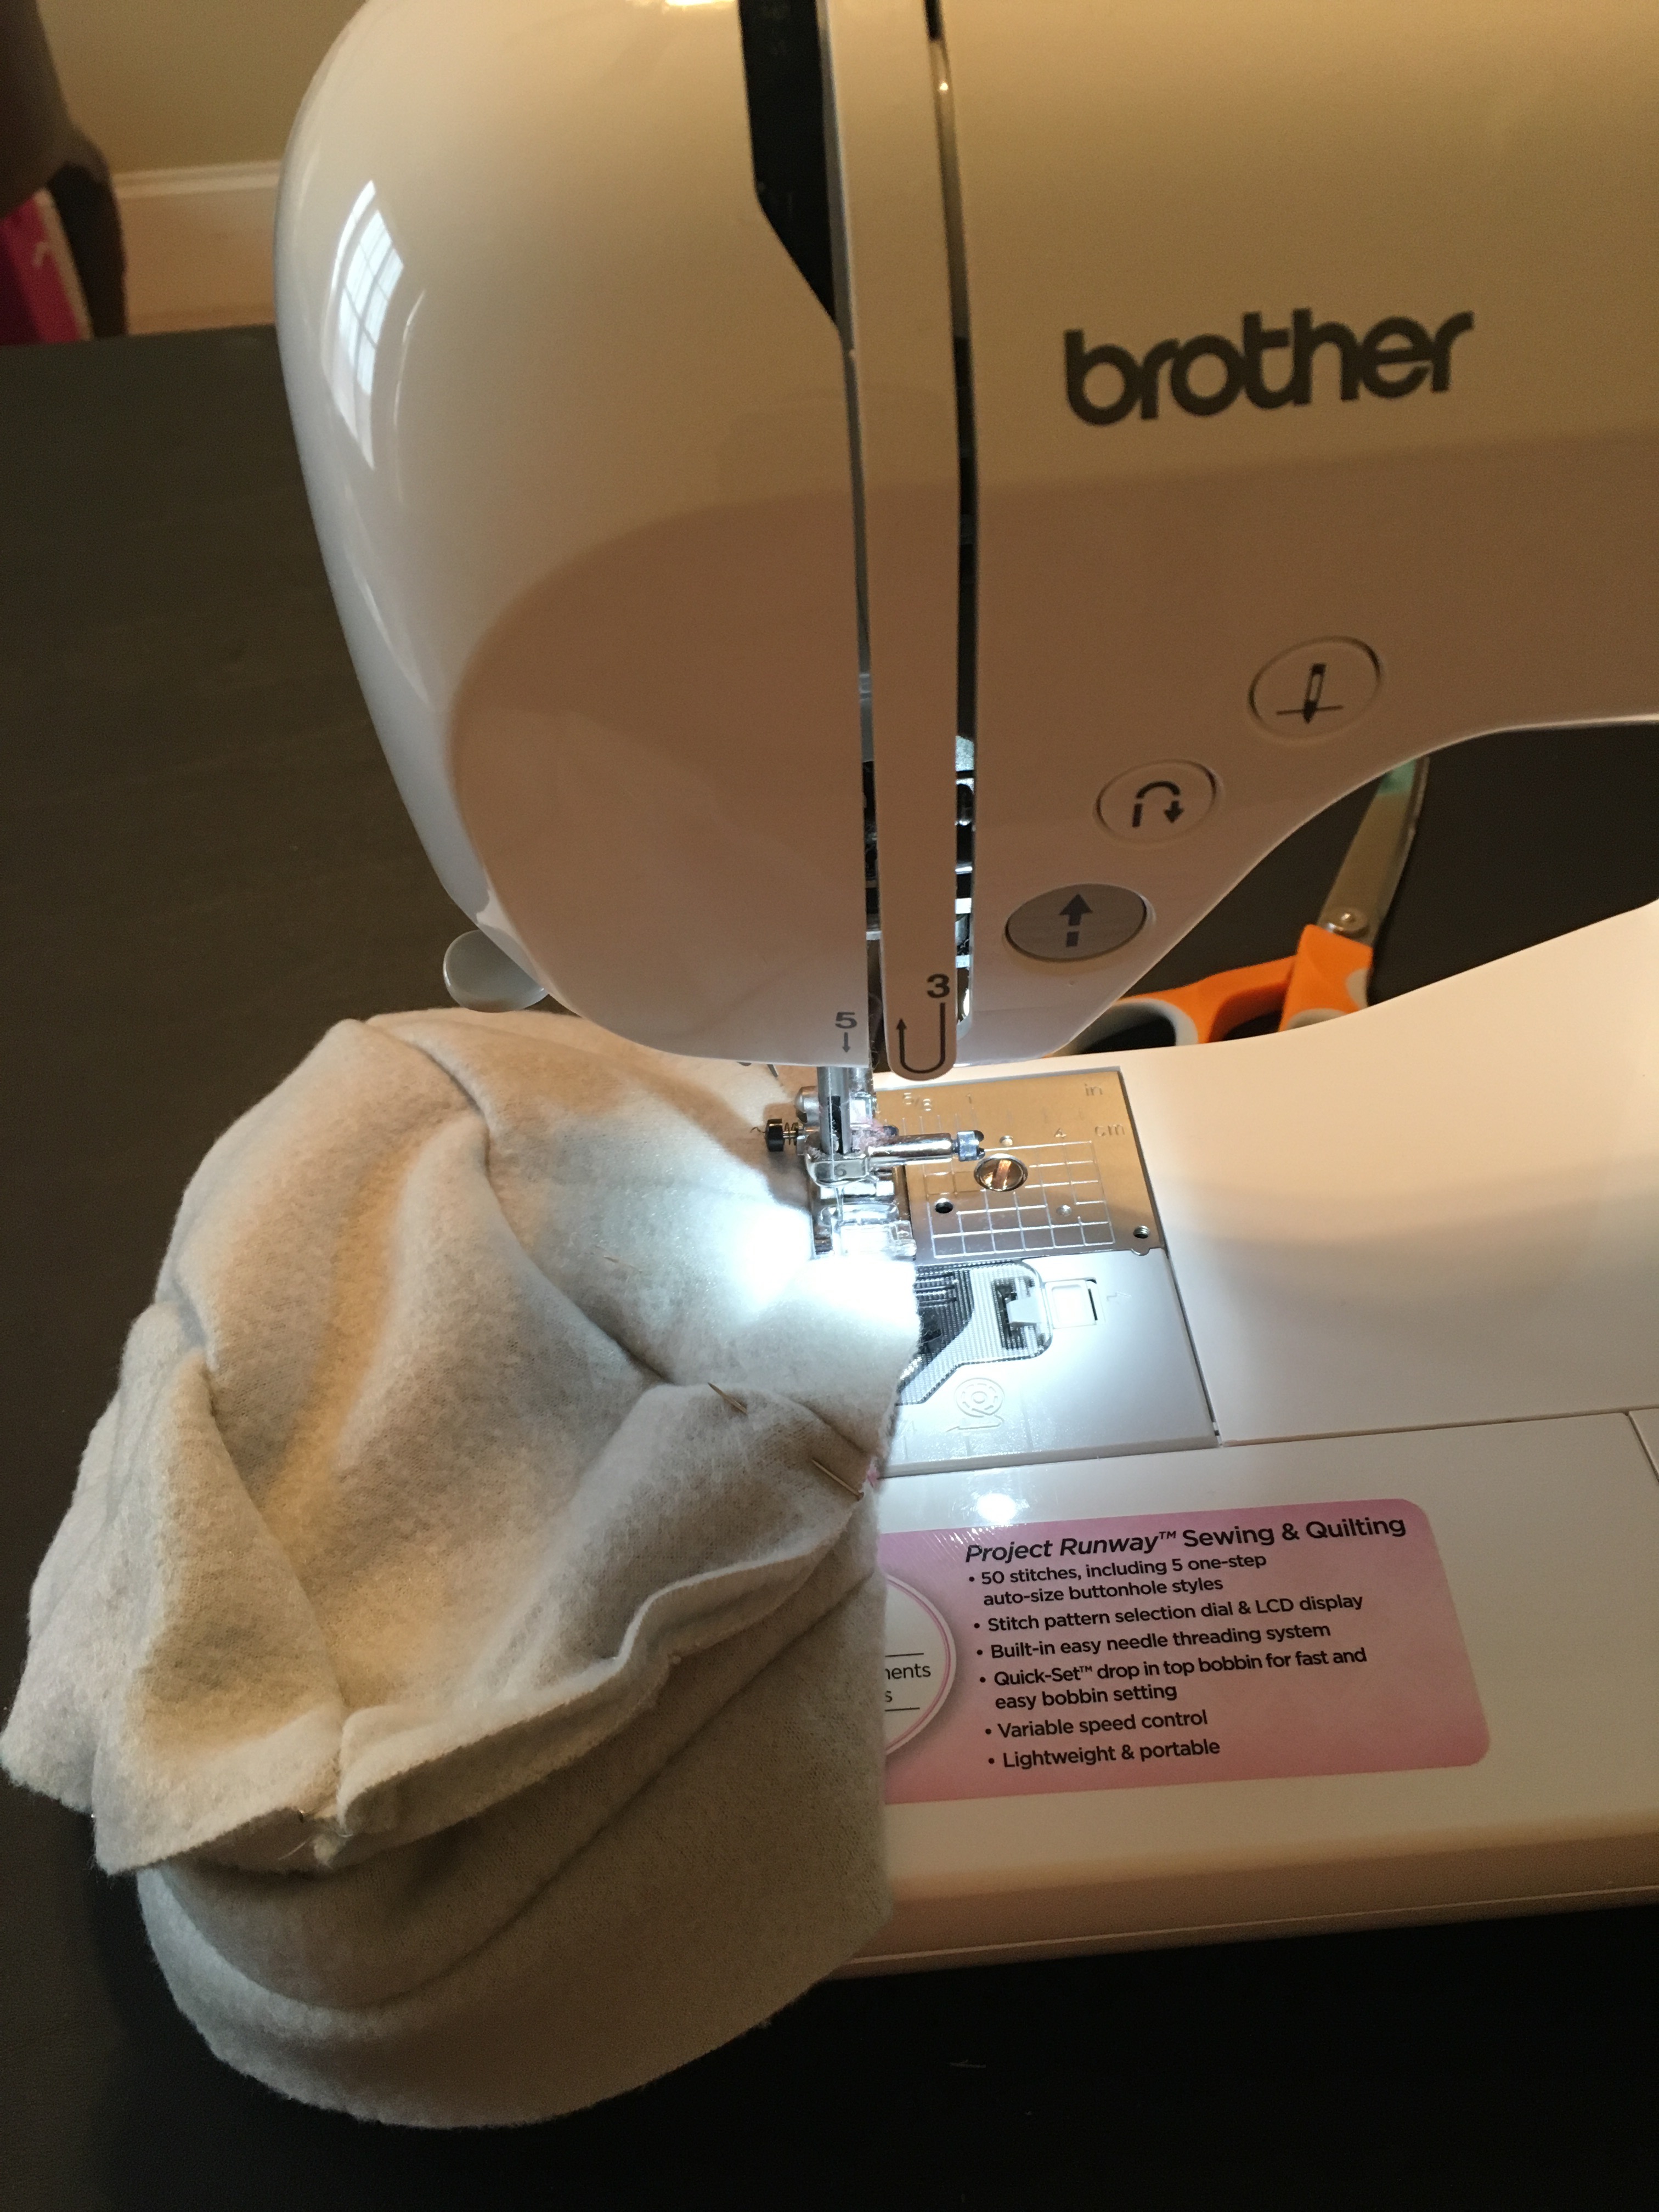
- Sew around the top of the hat, with a 1/2″ seam, making sure not to catch any of the rest of the hat, with the seam running along the outside.
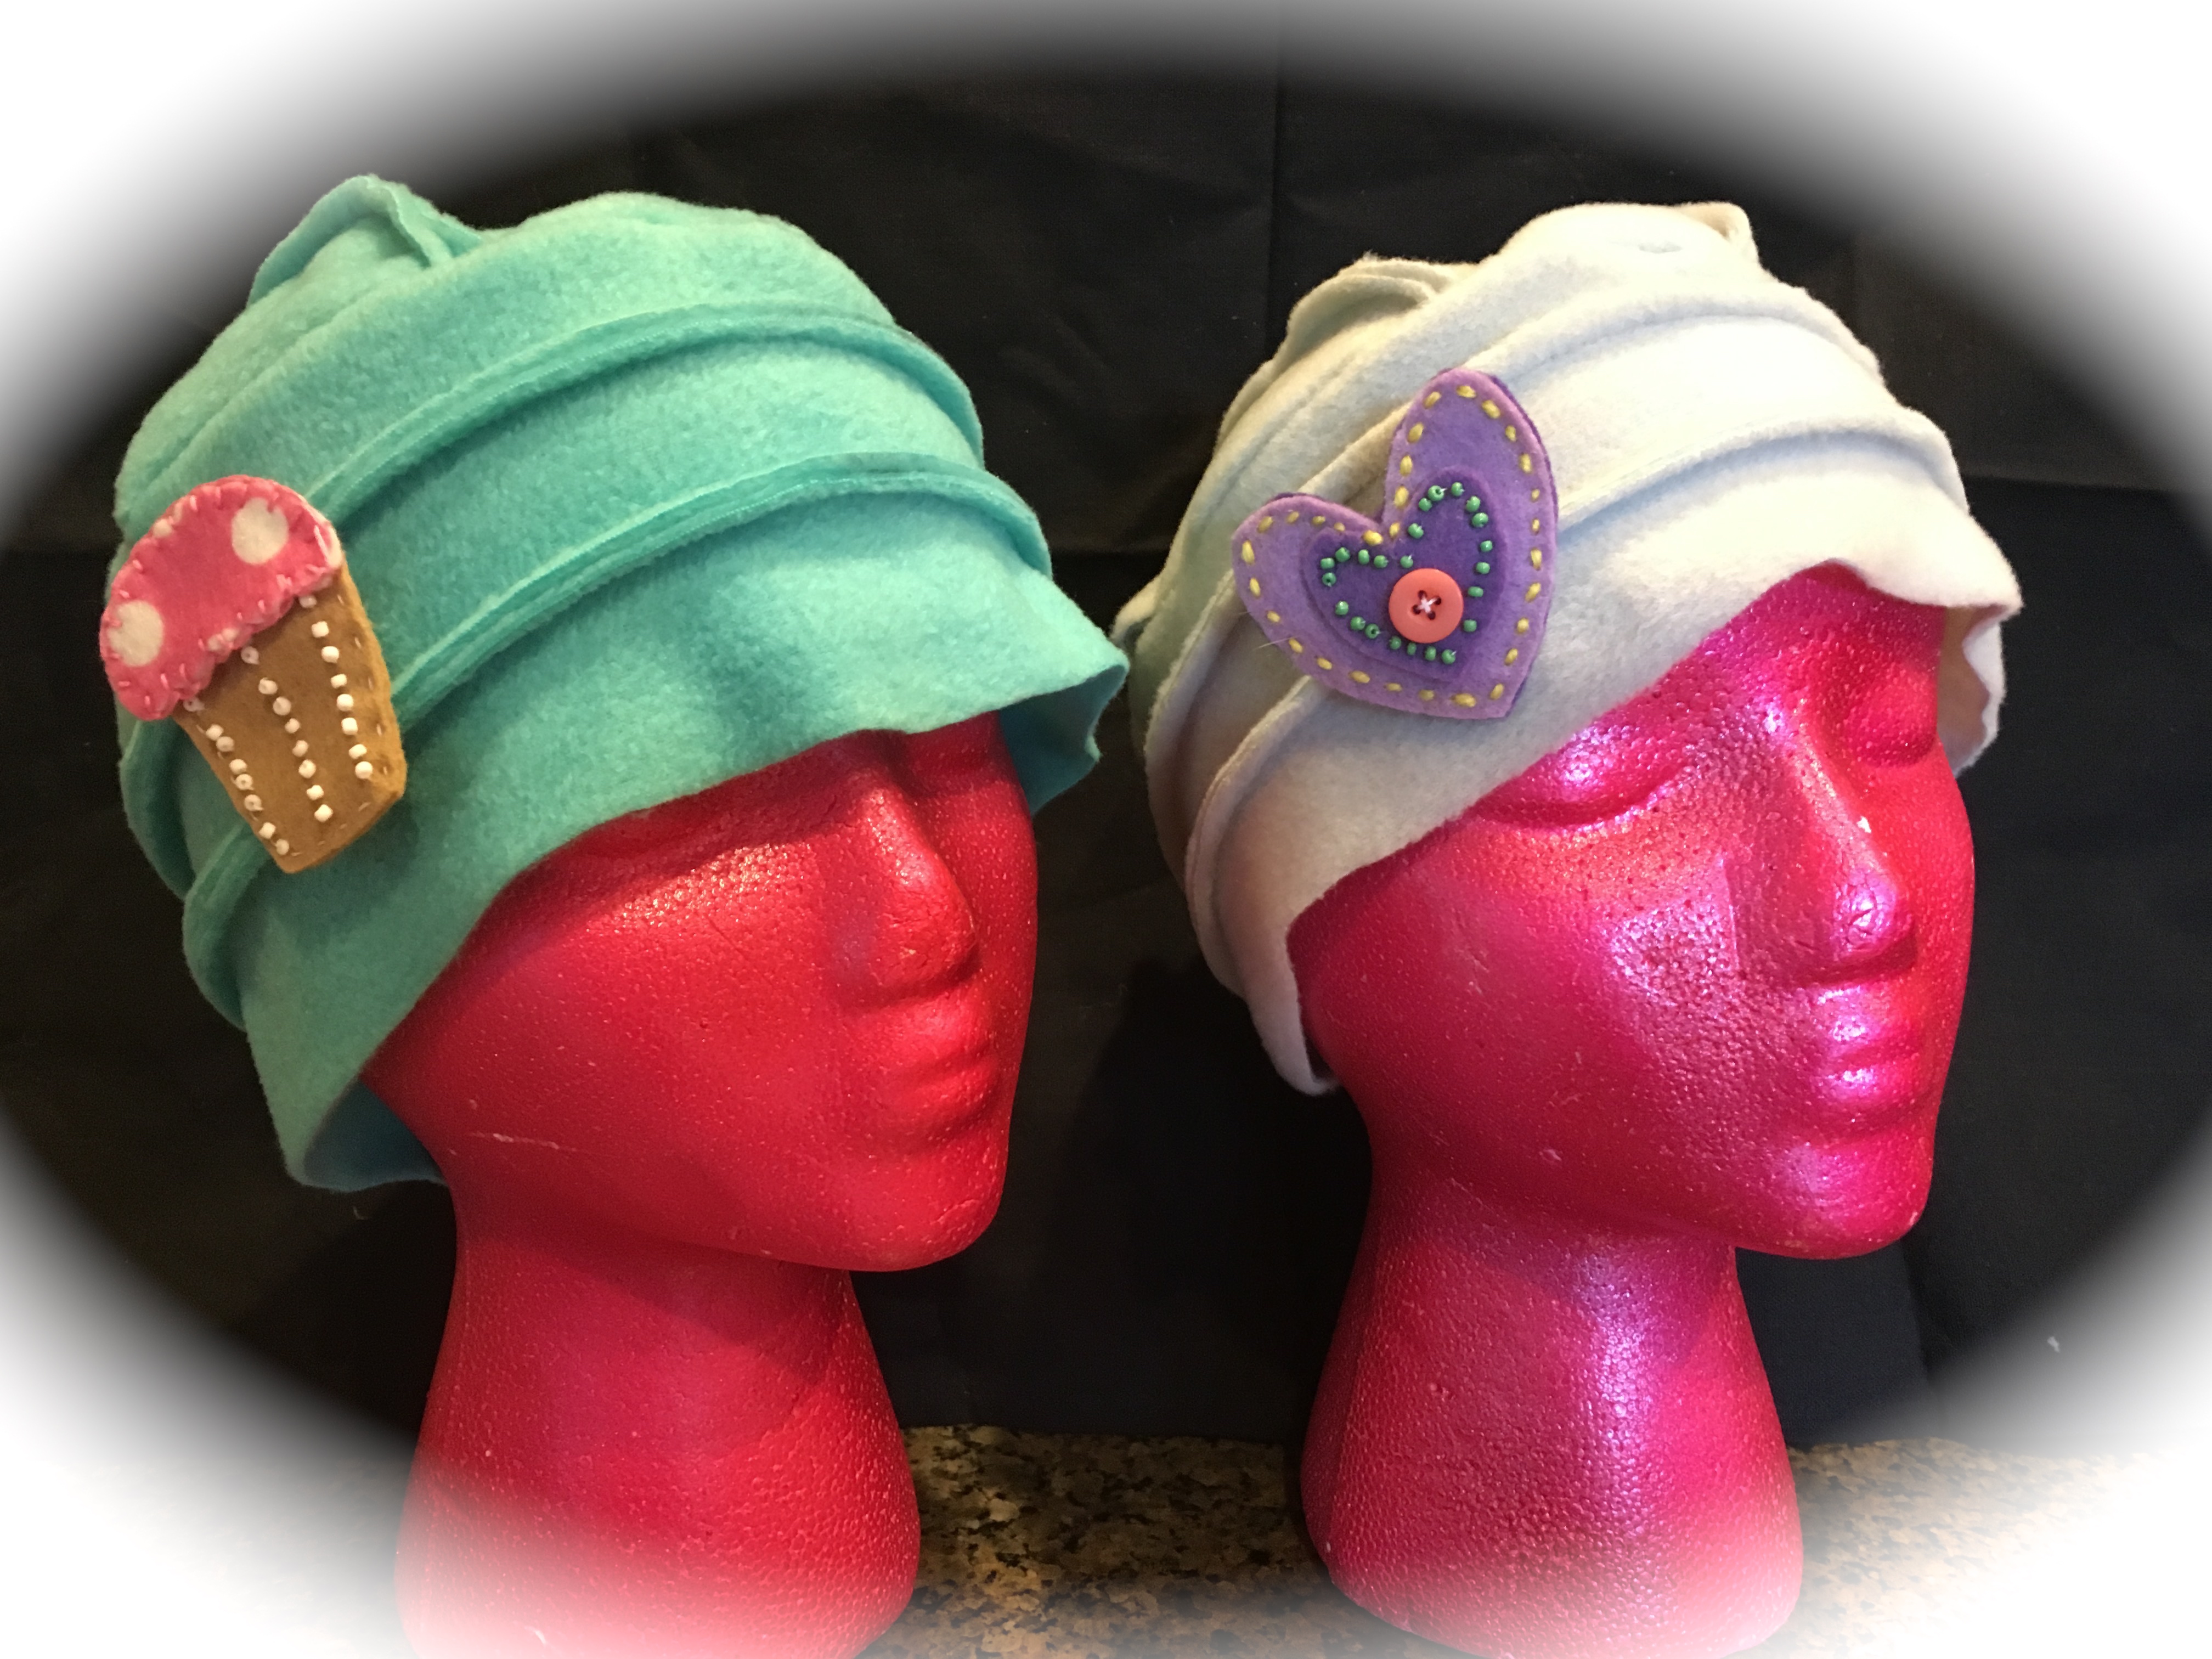
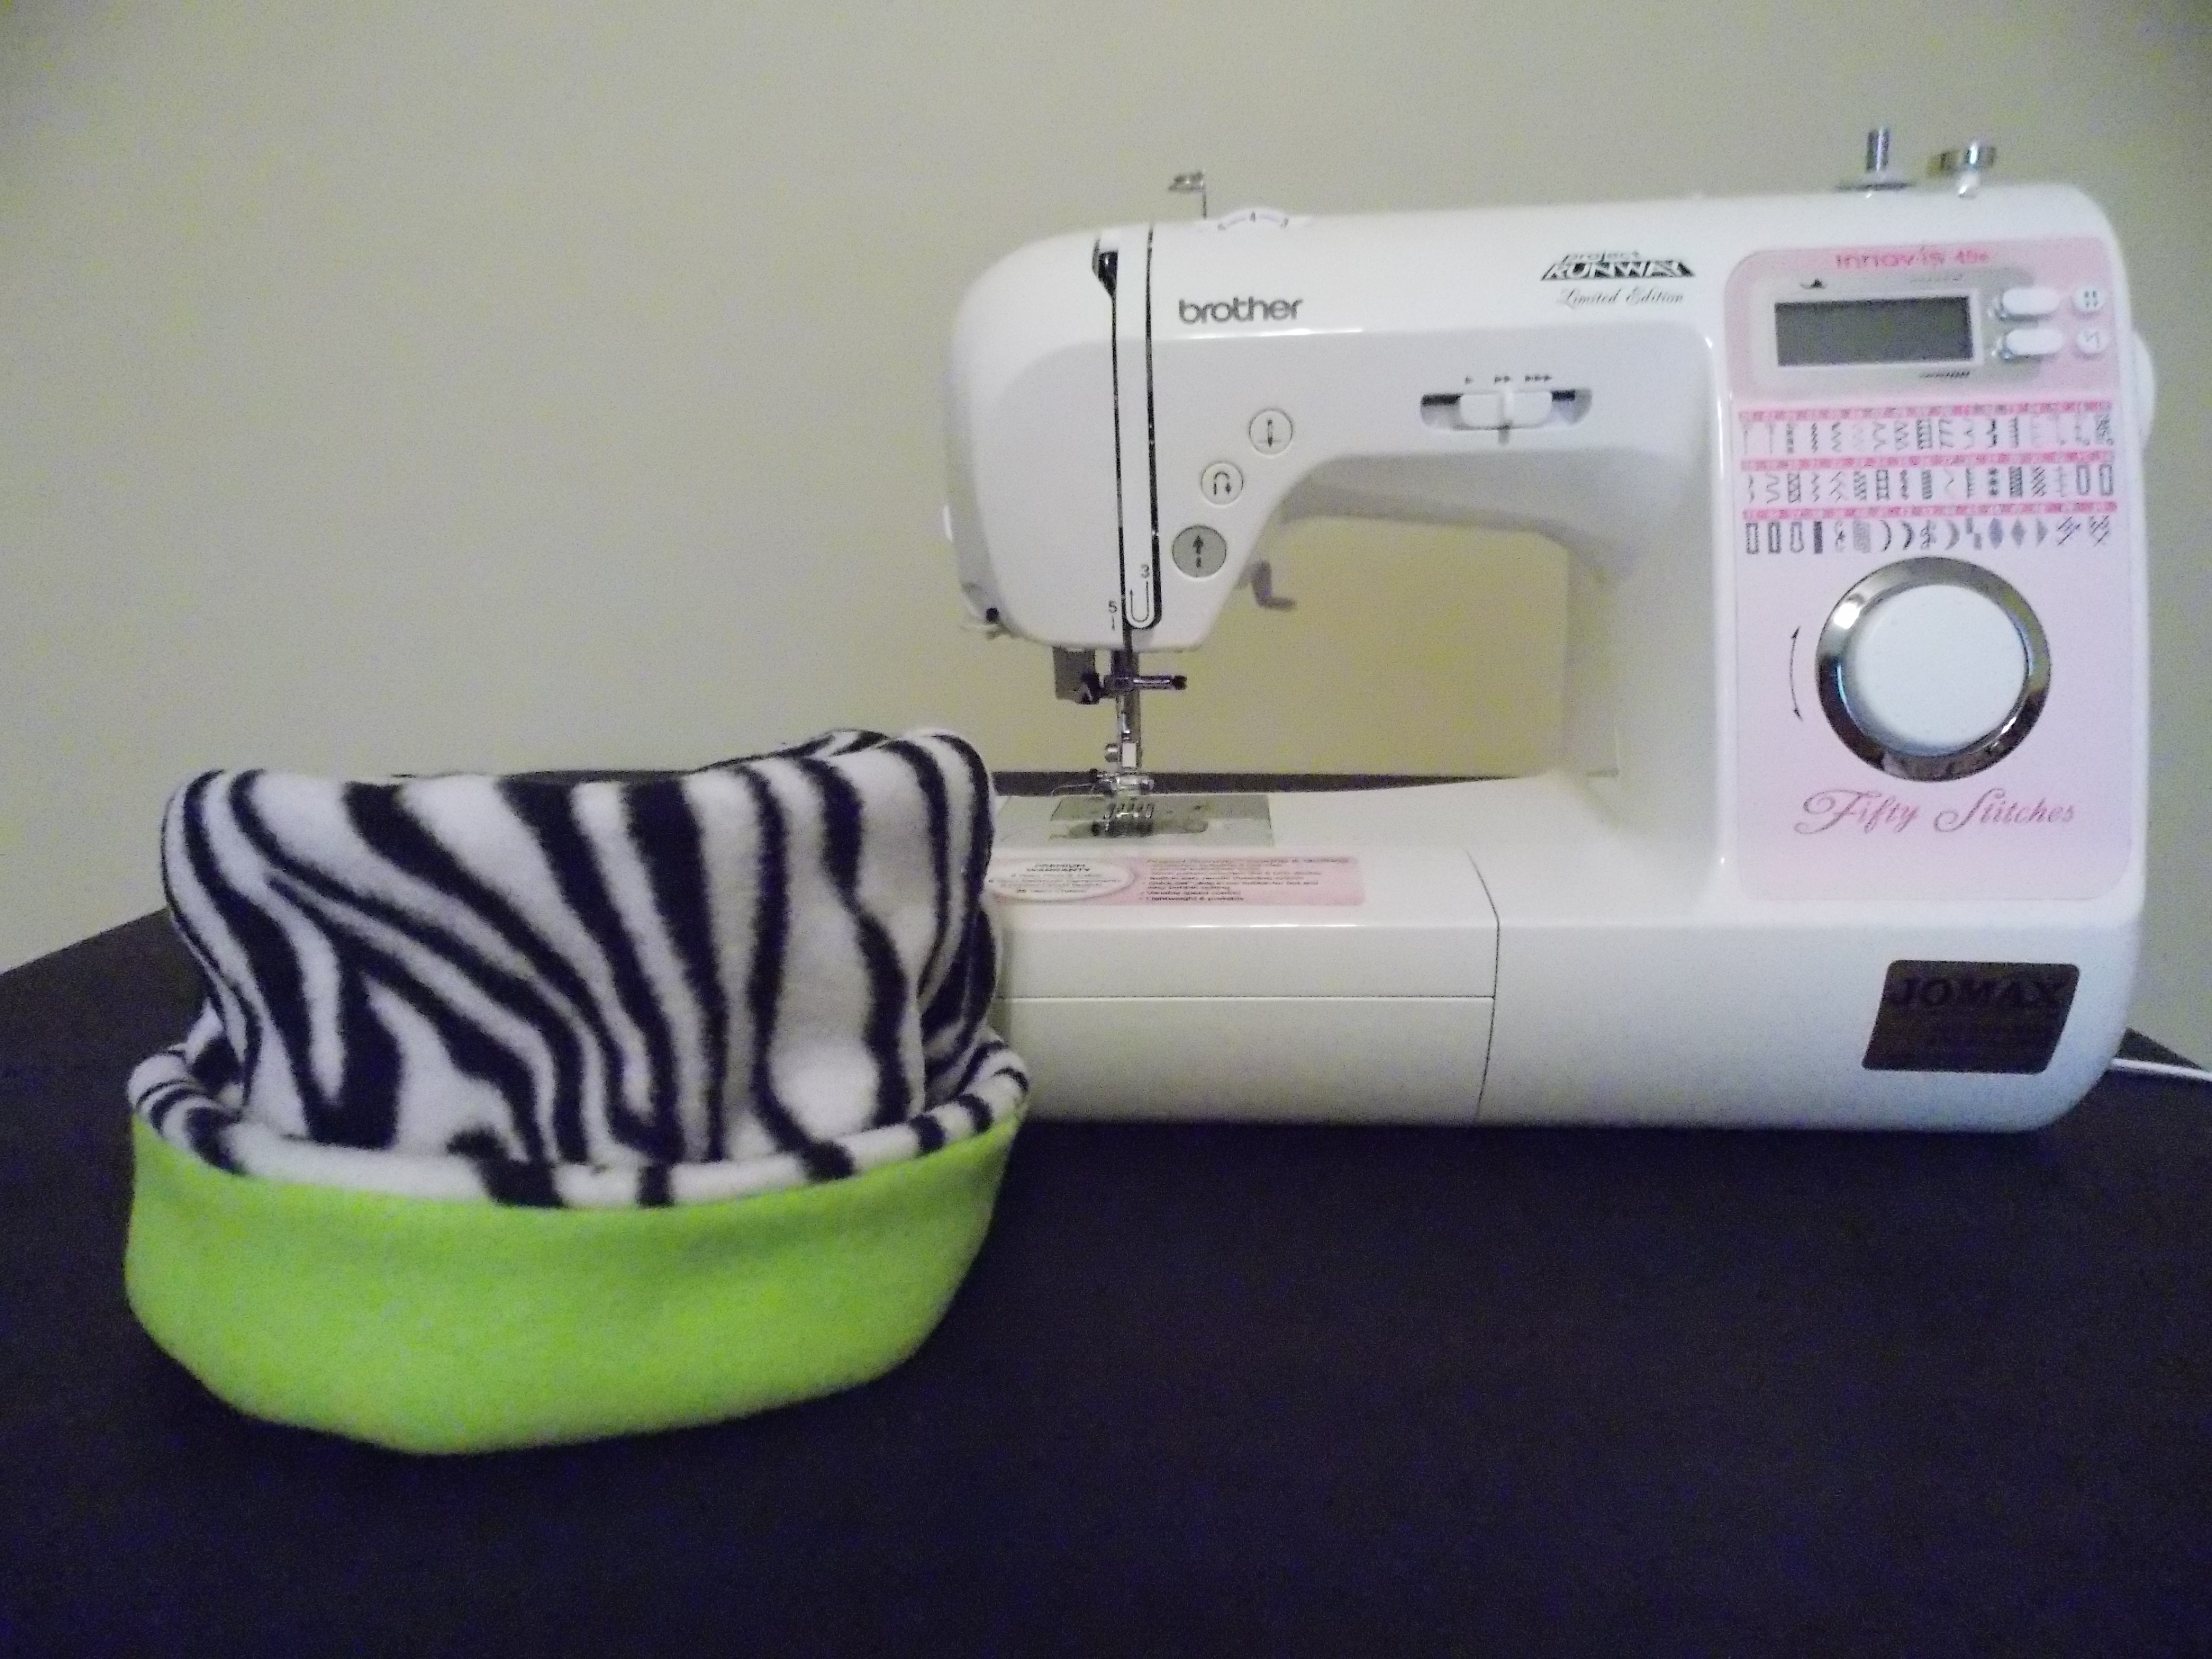
- Turn it rightside-out and… Voila! You should have the supercute Sassy Caps pictured at the top of this tutorial. The only seams that will touch the heads of the recipients will be the back seam of the band, and the seam around that attaches the top to the band. We don’t hem them because it would another seam to irritate sensitive skin, but you could if you wanted to. We made the cute pins, just by cutting out felt & attaching some beads & buttons, but you can make them in fun patterns, or dress them up any way you like!
Other hat patterns for the sewing machine
Here is a link to a free pattern that you can use: Creative Kindness Easy Hat. It is also nice and seamless inside, but requires you to double the fabric, which can get heavy & hot. Still, I used it to make this cute one!
Here’s a similar pattern, free at Headhuggers. See what you like!
